Blog Home > Tips and Tricks, Woodworking 101, Woodworking Projects
When the holiday season comes around, to no surprise, woodworkers turn to wood cutting boards as a go to gift for friends and family. A wood cutting board is easy to knock out over the weekend while providing a blank canvas for a woodworking artistic expression.
Whether you’re a seasoned woodworking pro, or new to the maker’s culture we all could use a little inspiration for our next cutting board project. Sure, the classic maple cutting board we all made in shop is nice, but why not add a little pizzazz?
Without further ado, here are my 4 favorite tricks for making your cutting board more interesting and one-of-a-kind:
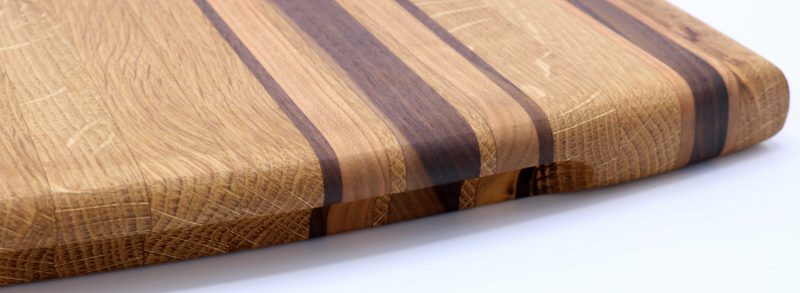
1. Choose an Unusual Pattern
This may be the easiest or hardest trick depending on your design palette and ambition!
Contrasting color is as important to art as it is a cutting board. Figuring out your style, and more importantly the style of your cutting board recipient will direct your design. Put it this way, do you like stark contrast, or favor blending complementary colors?
For the former, think about a dark hardwood like walnut (or wenge) with nearly white maple to create a black/white relationship. Whereas in a maple cutting board, adding mahogany or cherry will make the maple darken as a complementary color.
Once you know your color pallette, choose an interesting pattern! Such as a 3D end grain (plan), racing stripe (plan) or brick pattern (plan).
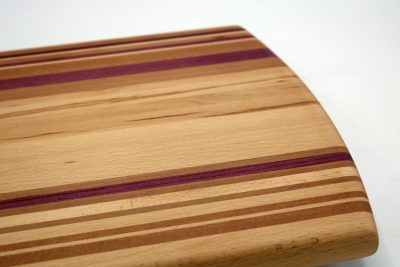
2. Add an Accent
Another way to mix things up: add a thin contrasting strip for a small pop of color. We do this in our cutting board kits by providing one board of a contrasting color to provide a visual boost!
If your cutting board is heavy on lighter woods, add a dark wood like walnut, or granadillo. Building a walnut cutting board and want to lighten it up? Try a piece of white limba or maple to stand out.
Bonus: It’s never a bad idea to add purple heart for the eye catching purple color or a colorful bit of canarywood.
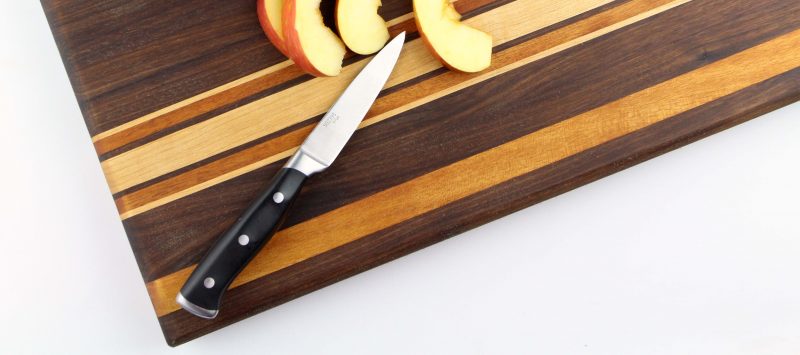
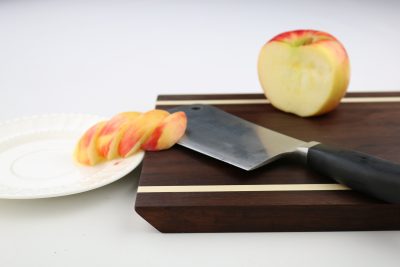
3. Build a Unique Shape
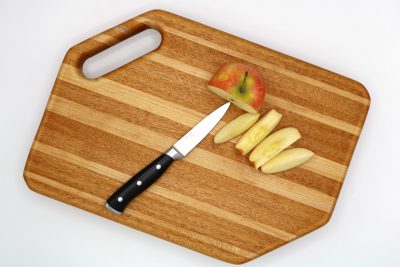
Who says a cutting board needs to be a rectangle? At Woodworkers Source, we like to add an interesting shape on 1 side. Check out these 2 cutting boards above.
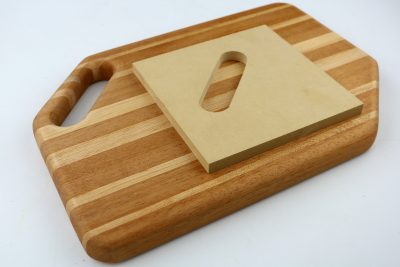
In the first cutting board, all that was needed, were two 45* cuts to create a parallelogram pattern. And on the second, we made a broad curve template to cut out on one side.
Want to add a little function to your design? Try cutting a parallelogram vertically to create an artistic lip to your cutting board. By doing this, you’ll never need move your cutting board to the edge of the counter to scrape the food you’ve cut.
4. Add a Handle
I have 2 primary reasons for adding a handle.
- A handle provides convenience for moving and cleaning.
- Your cutting board can become wall art.
Hear me out, nearly half the time I make a cutting board, I inevitably give it to the recipient and hear, “Oh this is too pretty to use.” To that, I first say, “It’s too pretty not to be used!”… But, as a fall back, a handle does allow the recipient to hang it on the wall so they can tell all their friends about my master woodworking (humbly of course).
In all seriousness, a handle is great for dealing with a cutting board. Whether you rout in a hidden grip on the sides or cut out a handle, Everyone appreciates having a handle to easily move their heavy duty good looking cutting board.
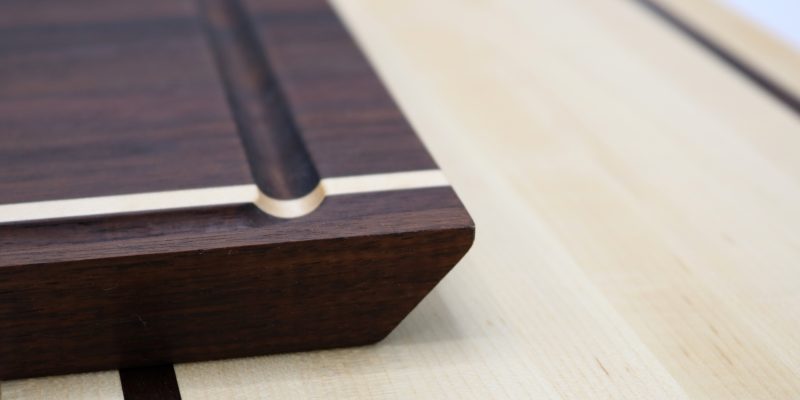
Bonus: Rout a Drip Well

Okay, admittedly a drip well isn’t going to WOW the recipient of your stunning looking cutting board. But, on the other hand they will really appreciate your thoughtfulness when the drippings of a steak or thanksgiving turkey are contained and not running all over the counter!
A drip well is super easy to add using a handheld router. Get yourself a round nose bit of your desired width (we use ½”), then make yourself a template and use a guide for a precise cut. On our cutting boards we make a template about 1” smaller than the cutting board in each direction to leave ¼” outside of the well. Just remember, different router bits and guides will change how much space yo
Now Get to Designing!
Time to get cracking at designing your cutting board. We’ve got you covered with a couple cutting board kits (here’s my favorite), along with 1-¾” square cutting board strips here. And if you have any other tricks you love, share them below in the comments.
Marketing Manager – Woodworkers Source
We’re a family-owned lumber & woodworking supply retailer with 3 delightful stores in Arizona, and 35 friendly employees.
Corey oversees marketing in-store and online for Woodworkers Source. He’s a sucker for dark hardwoods like Walnut and Wenge, yet has a soft spot for Canarywood.
Discussion, Questions & Answers