6 Simple Steps to Make a Decorative Hardwood Cutting BoardYou won't believe how easy it is to make a great looking cutting board with walnut & mahogany
In this video, we started with an assortment of boards in various widths but each one 20″-or-so long
3 boards of walnut
2 boards of mahogany, and
1 board of hard white maple
So we cut each board into strips 1-1/4″ wide. This dimension will become the thickness of the cutting board – so you can choose a different dimension if you want.
Then we selected a few of those strips and ripped them into thinner strips, but rotated them to maintain the 1-1/4″ width. Therefore, some strips were 1/4″ x 1-1/4″ or 3/8″ x 1-1/4″. Somewhere in there. It’s not a critical how thin you rip them. The thinner strips simply provide a little bit of visual interest in the final project.
2. Arrange Strips in a Pattern You Like
Then we lined up the strips and arranged them into a pattern.
Once we settled on the arrangement, we used a felt-tip marker to strike an X across the project. That gives you a queue or a line to keep each piece in the right position, just in case they somehow get out of order.
3. Glue It Up
We then separated the cutting board into two sections and glued each section separately. This was just to keep the project manageable since there were so many strips. We thought two sections were easier to manage than one.
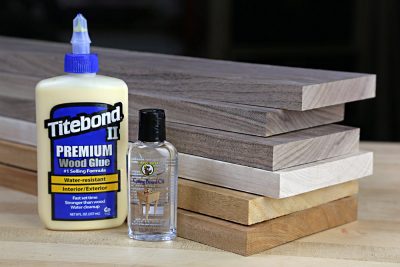
Use Titebond II, and spread the glue on each piece to get full coverage. Then clamp it up, and use one clamp every 8 inches or so.
The pieces are going to slip around. That’s normal, if not frustrating. But just go with it, and do your best to keep them as flush as possible
4. Plane It Smooth
If you don’t have a planer, you can use a handheld router. You’ll need to make a carriage and sled, and use as large of a straight or mortising bit as you have. Search YouTube for “router planing sled” and you’ll find a handful of tutorials.
This procedure will also determine the final thickness of the project. Even though we ripped our strips to 1-1/4″, the cutting board final thickness ended up at 1-1/16″.
And that’s okay.
5. Cut To Size + Give It Shape
We used a template to make a curve on the two ends of the cutting board. You can do the same, or you could choose to make a totally different shape.
The trick, though, is to use a template (unless you just cut a rectangle on your table saw). You’ll most likely need to spend some time making the template, and shaping it to perfection. Then trace the template onto your cutting board, rough out the shape with a jigsaw or bandsaw.
Then use double sided tape to affix the template to the workpiece and use a flush trim router bit to trim it. It’s a slick procedure, and once you learn the technique you’ll return to it over and over on more projects in the future.
Likewise, use a router to shape the edges. We used a 3/8″ roundover which is about as simple as it gets.
6. Sand It + Oil It
We sanded every side of the cutting board starting with 100 grit, then 120, 150, 180, and 220 to make it baby-bottom smooth.
We applied Howard’s Cutting Board Oil by drenching it and letting it sit for 20 minutes. Then applied a little more, and let that sit for another 20 minutes.
Then we wiped off the excess oil.
And that’s it! Cutting board is ready to use.
Cut some strips of wood to be rotated on edge to create the thickness of your cutting board. In this case, we ripped strips 1-1/4" wide. cutting-board-stills-2
Rotate a few of the 1-1/4" wide strips on edge, then rip some thinner strips for accent pieces. For variety, cut some thinner than others, such as 1/4" or 3/8" or 1/2" or any combination. cutting-board-stills-3
Arrange the strips into a pattern that you like. cutting-board-stills-4
Glue up the cutting board. Use one clamp every 8 to 10". you can also choose to glue up your cutting board in 2 or more sections if it makes it easier. cutting-board-stills-8
Plane it smooth, after it dries. If you don't have a planer, use a handheld router chucked with a mortising bit, and make a panel sled jig (check youtube for options and tutorials). cutting-board-stills-9
Use a template to mark the curve or shape. cutting-board-stills-910
Cut the curve or shape on a bandsaw or jigsaw. Don't try to make it perfect. Instead, cut just proud of the line. cutting-board-stills-11
Tape the template to the workpiece and trim the remainder of the shape flush. cutting-board-stills-13
Give the edges a little round over. We used a 3/8" radius, but feel free to choose a different radius. cutting-board-stills-14
Sand it smooth. Step through each grit from 100, 120, 150, 180 and 220. cutting-board-stills-15
Apply a cutting board oil. Wipe it on, let it sit for 20 minutes, then wipe off. Repeat another 2 times, then give it a buff with a soft cloth. cutting-board-stills-16b
More Cutting Board Tips
Don’t soak a hardwood cutting board in water
Wipe it with a damp sponge after each use
Sand and re-oil when it starts to show some age (about every 6 months)
Vice President of Operations – Woodworkers Source
We’re a family-owned lumber & woodworking supply retailer with 3 delightful stores in Arizona, and 35 friendly employees.
Mark oversees the company and creates tutorials on wood finishing and woodworking tips for hardwood lumber.
Woodworkers Source is a division of MacBeath Hardwood Co.
You are always welcome to stop in anytime to hand-select your own boards.
Or you can order ahead for a scheduled pickup! Typically ready in 24 hours at your chosen store. Just call or order online. Available times are shown during checkout -- pick whatever works for you.