Blog Home > Ask Us, Tips and Tricks, Woodworking 101

When you spend $2000 on a new a table saw, chances are it will come with a mediocre blade. And you’ll probably endure that blade until it’s too dull to tolerate, then you’ll finally decide to dip into the lumber budget to buy a new one.
That’s when you’ll discover a sea of choices, and the experience will probably be absurdly confusing. 10″ blades can come with as few as 20 teeth but go up to 120 and the teeth all have different shapes and angles. And the cost is even worse: from $30 up to $200. If all you want to do is cut some wood for building furniture, how in the world do you figure out which one is right for you?
So let’s simplify the matter. The three styles of blades below are the ones that will do you right if you’re into building furniture and cabinetry using hardwoods. We’re not talking about brands or models here, just styles of blades.
Should you spend a lot of money on a good blade? Um . . . yes. The reason why is not just for quality of cut, which trickles down to better precision, better joinery, and a happier experience with woodworking — but it’s also for the longevity of the blade. Pricier blades boast meatier and more durable carbide teeth that stay sharp longer, and can withstand more sharpenings over the long haul because there’s more carbide to work with. In the long run you’ll actually spend less on blades, and hopefully more on the actual joy of building projects. So even though a blade like this could set you back $100 or more, you’ll get longer service life than you would with a lower-end blade.
With that, here goes.
1. Start With a 40t General Purpose or 50t Combination Blade
Why This Blade?
It’s no surprise that every table saw owner wants one blade that will do it all. A general purpose blade is as close as you’ll get. It will cross cut and rip most hardwoods with suitably clean results, and a good one can handle cross cutting on double sided plywood with only mild splintering of the outer veneer. You can get away with just this one blade for a lot of your woodworking.
What to Know
Cry once, buy once: get the best general purpose blade you can. High end general purpose blades run between $100 and $150, but you’re asking this blade to do the vast majority of your table saw work. They have their limits, but the old adage tends to be true, you get what you pay for. But know this: general purpose blades face their real test in ripping dense woods like cherry, maple and beech. These woods burn easily (usually when ripping), even with the best general purpose blades. For cutting veneer-faced sheet goods and plywood, you’ll always get a better cut by using a zero-clearance throat plate insert and making a scoring pass on cross cuts.
 TIP – Get Splinter-Free Cuts in Plywood and Melamine
After you set your fence for the cut, set the blade so it’s just about 1/16″ above the table. Make the cut – it should only cut a shallow groove, also called a score, in your work piece. Then raise the blade to the height for full through-cut and make the final pass. You’ll get chip- and splinter-free results every time. This technique is called making a scoring pass.
How to Identify
General purpose and combination blades look quite different from one another, but they often perform the same role for woodworkers. Here’s how they compare.
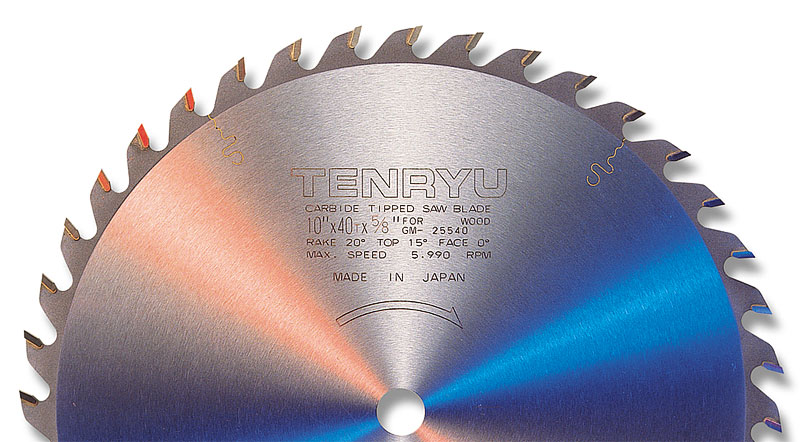
General Purpose Blade Expect a general purpose blade to have 40 to 50 teeth with an alternating top bevel grind on the teeth, alternating face angle, somewhat deep gullets. Shown: Tenryu Gold Medal 10″ x 40t GM25540-2 Expect a general purpose blade to have 40 to 50 teeth with an alternating top bevel grind on the teeth, alternating face angle, somewhat deep gullets. Shown: Tenryu Gold Medal 10″ x 40t GM25540-2 |
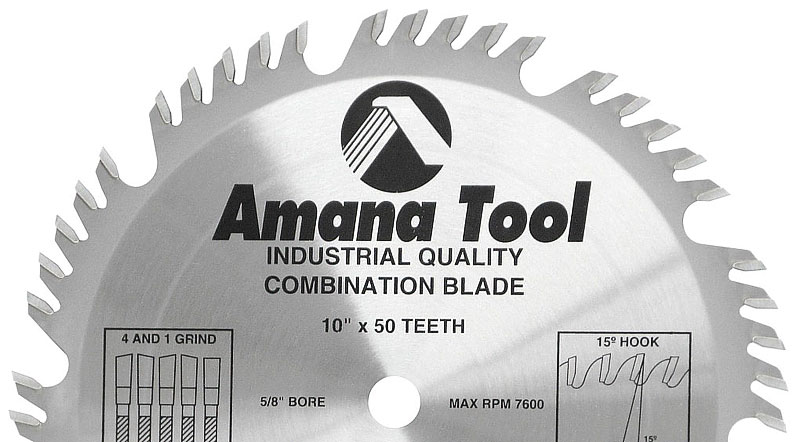
Combination Blade You can spot a combination blade a mile away. The 50 teeth are arranged in clusters of 5 teeth with deep gullets between clusters. Shown: Amana 610504 10″ x 50t You can spot a combination blade a mile away. The 50 teeth are arranged in clusters of 5 teeth with deep gullets between clusters. Shown: Amana 610504 10″ x 50t |
2. Get an 8″ Stack Dado Kit
Why This Blade?
You’d be missing out on the full capabilities of your table saw without a dado blade set. This is a special set of blades that can be sandwiched together on the arbor to create wider grooves in wood, usually up to 3/4″. They’re a life-saver for furniture and cabinetry building where numerous types of joints need notches, grooves, and rabbets.

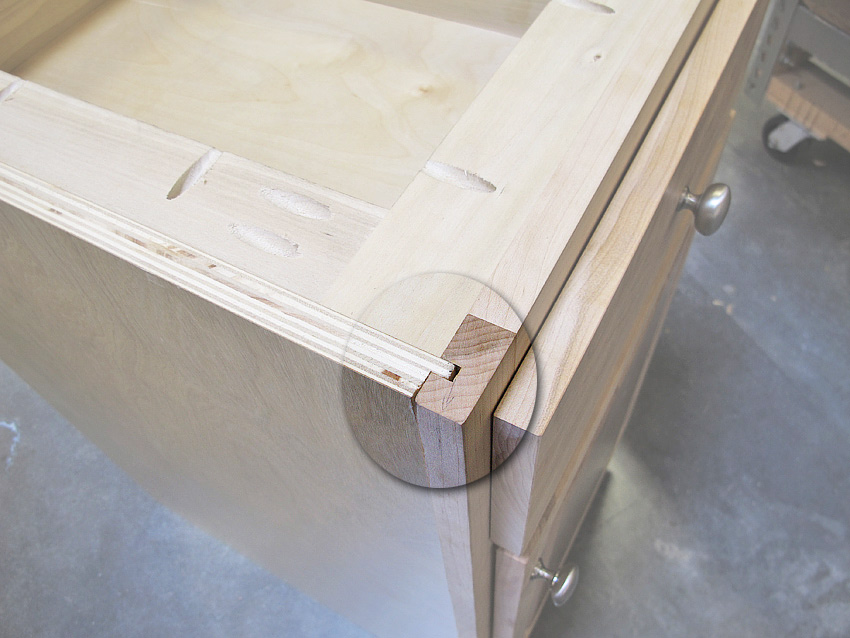
Using your table saw to make a rabbet and dado joint is a great way to join a face frame to a cabinet so that it comes out square and true.
What to Know
To use a dado set on your table saw, you’ll want to swap out the throat plate (aka insert) for one that can accommodate the kerf width you need to achieve. For cutting across the grain of plywood or sheet goods, it’s a prudent practice to also use a zero-clearance insert to minimize – or elminate – chipping and splintering.
A dado kit that stacks produces a flat bottom cut, which is exactly what you want for rock-solid furniture and cabinet joints, and others like the box joint. But not all dado blades stack. Others are called “wobblers” or “dial dado” kits, and these will leave a slight radius on the bottom of your cut. For applications in which the joint will be unseen, the rounded bottom is usually fine. But the downside is that they do not have full contact with the mating piece, making the glue joint less reliable over the long haul.
Cutting a dado can be a little alarming the first time – you’re hogging off a lot of wood in one pass. So take your time, feed your material slowly, and use safety push blocks or hand guards.
To make successful dadoes and rabbets in plywood or other panels, get yourself acquainted with using feather boards and a sacrificial fence.
Notice, too, that when you set up a dado on your table saw, this changes the distance from the outer blade to your fence. Don’t rely on the measuring tape attached to your table saw fence rails when setting your fence.
How to Identify
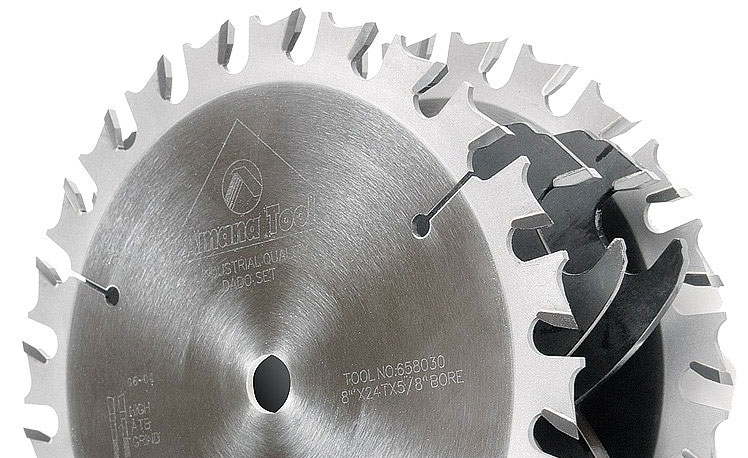
A good dado kit has 6 individual blades and an assortment of shims for fine-tuning the final cutting width. There are two 8″-diameter round blades, and 4 chippers that look more like wings than blades. The two round blades each have 1/8″ kerfs, and should “sandwich” the chippers which come in 1/16″, 1/8″ and 1/4″ widths. Stack these up on your table saw arbor to achieve the cutting width you want to cut. Refer to the manufacturer’s instructions, too.
Never use the dado kit without both of the two round blades in the arrangement, and pay attention to which of these is designed to go on the left and right of the set-up.
Dado Blade Set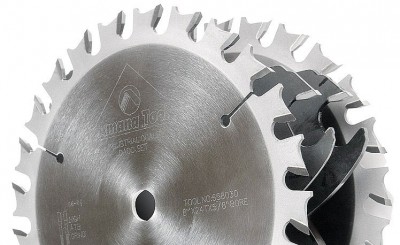 Shown: Amana 8″ Shown: Amana 8″ |
3. As Your Skills Progress, Get a 24-tooth Ripping Blade
Why This Blade?
A dedicated ripping blade will save time and effort when you’re ripping a lot of boards to width, plus a good one preps the edges well enough for edge-gluing panels. When you’re ready to move on from just a general purpose blade, a good ripping blade is probably the choice.
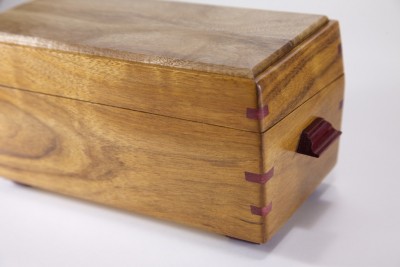
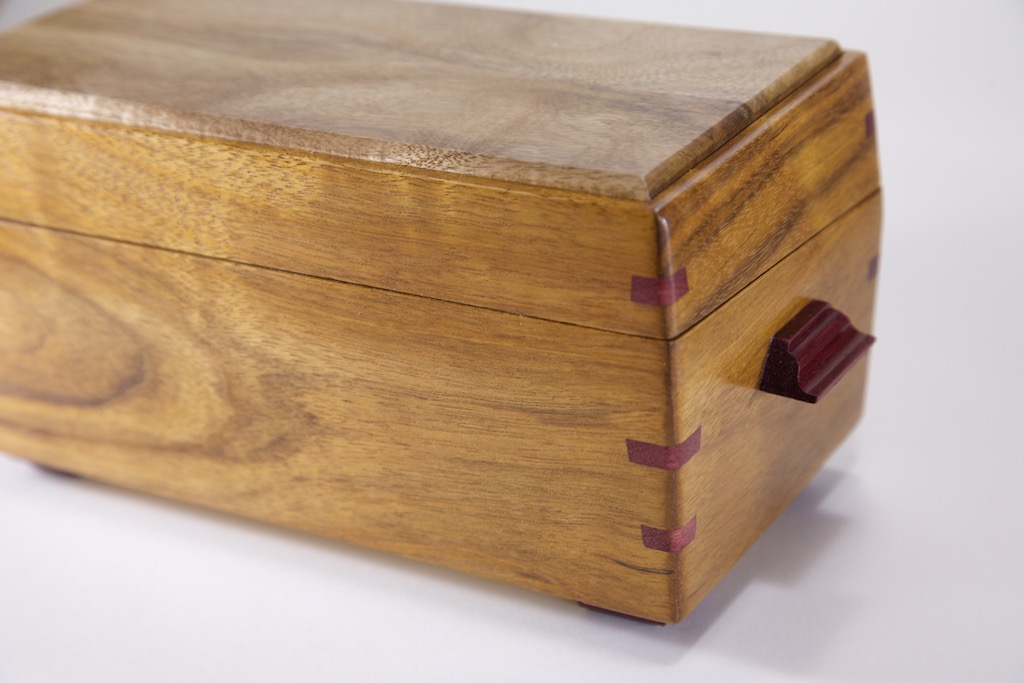
If you’re going to use your table saw to cut slots for decorative splines you’ll want to use a ripping blade. The flat teeth leave a crisp, flat-bottomed groove. Other blades won’t, making the splines look sloppy. Click the pic to zoom in – these splines have a nice, tight fit.
What to Know
Important distinction: ripping is the action of cutting solid wood with the grain, rather than across the grain. And a blade that excels at ripping will be poor for cross cutting, and vice versa.
A good ripping blade, or a “glue-line” blade, leaves ultra-smooth edges even in the hardest woods. You can skip the jointer and go straight to the clamps. But it’s good for much more. Ripping blades have flat-topped teeth, which makes them just the thing for cutting slots for decorative splined joinery. The flat tooth produces a flat-bottomed groove, which gives you a perfect fit in the exposed splines. By design, this blade cuts quickly – the low tooth count reduces heat, which means wood will slide through the blade with very little resistance. You’ll notice a difference, even when ripping 8/4 hard maple.
More teeth does not mean a better cut when you’re ripping solid wood. In fact, the opposite is true. More teeth means more heat which forces you to make slower cuts. In turn, you’ll get more saw marks and burns. A good 10″ ripping blade will have only 20 to 30 teeth.
How to Identify
Usually 20 to 30 teeth (on a 10″ blade) with an aggressive forward rake and deep gullets between the teeth. The carbide teeth most often have a flat face and a flat top grind.
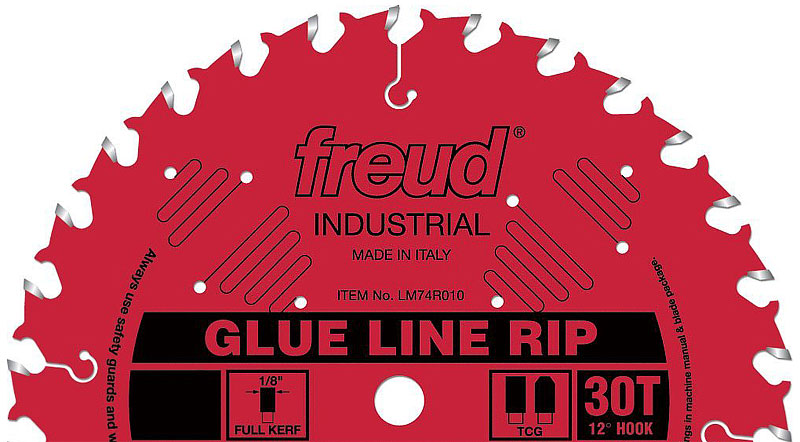
Ripping Blade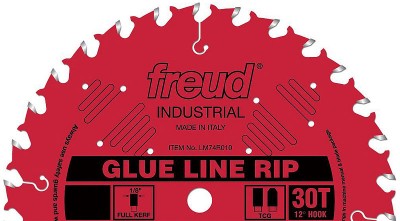 Ripping blades. Shown: Freud 10″x 30t Ripping bBadeLM74R010 Ripping blades. Shown: Freud 10″x 30t Ripping bBadeLM74R010 |
Honorable Mention: 60t or 80t Cross Cutting Blade
Why This Blade?
A good cross cutting blade is designed to provide ultra-smooth cuts going across the grain without splintering or burning. And ultra-smooth cuts equate to better precision and tighter joinery in your projects.
What to Know
Generally, more teeth equals a better cut. A 10″ cross cutting blade should have 60 to 80 teeth with an alternate top bevel grind (ATB for short).
Pay attention to the grind on the teeth. If the 80-tooth blade you’re considering has a “Triple Chip Grind” (TCG for short) know that this blade won’t cross cut solid wood very well. It’s better suited for cutting melamine, chipboard, and plywood.
How to Identify
Usually 60 to 80 teeth (on a 10″ blade) with shallower gullets between teeth and a more gentle forward rake around 10°. The carbide teeth most often have an alternate top bevel grind and angled faces.
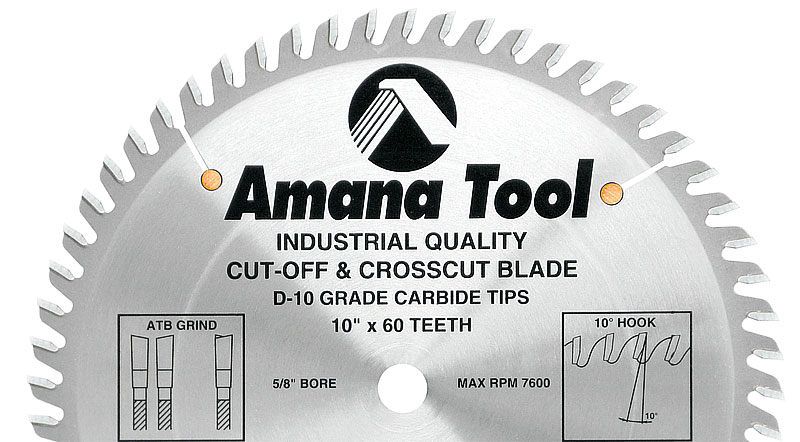
Cross Cutting Blade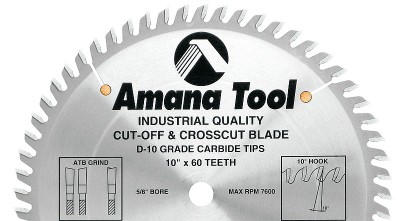 A lot of teeth, and shallow gullets. Shown: Amana 10″ x 60t cross cutting blade A lot of teeth, and shallow gullets. Shown: Amana 10″ x 60t cross cutting blade |
TIP: Thin Kerf vs. Full Kerf
Kerf is the term for the width of the carbide teeth. A full kerf is 1/8″, whereas thin kerf is just 3/32″. As you can imagine, it takes less machinery muscle to force the thin kerf blade through solid wood than it does the full kerf. On long rips, for example, lower powered saws might bog down. So a thin kerf blade is actually easier on your saw motor and parts. But the downside is a thin kerf blade doesn’t offer the same precision as a full kerf blade because it will deflect more when under load.
So, if you have a 220-volt 3 hp saw there’s no real need to choose a thin kerf blade. But if your saw runs on 110 volts, you’ll experience easier sawing with a thin kerf blade.
But be aware if your saw has a riving knife. While riving knives provide a wonderful safety measure, you have to match the thickness of the riving knife with the kerf of your blades (or vice versa) — if the riving knife is thicker than the blade, you can’t make the cut, and if it’s thinner you’re not as protected. The benefit of thin kerf blades is more apparent in ripping blades, and less so in cross cutting blades.
Vice President of Operations – Woodworkers Source
We’re a family-owned lumber & woodworking supply retailer with 3 delightful stores in Arizona, and 35 friendly employees.
Mark oversees the company and creates tutorials on wood finishing and woodworking tips for hardwood lumber.
Woodworkers Source is a division of MacBeath Hardwood Co.
Discussion, Questions & Answers