Believe it or not, it’s the nature of a bandsaw to drift either left or right of being perfectly parallel with the bandsaw fence. It doesn’t have to do with the quality of a bandsaw. But it’s not necessarily the quality of the blade, either: if you swap the bandsaw blade with a new quality blade, the only thing that changes is the angle at which the blade drifts. Rest assured, it still won’t cut straight with the fence. Being a happy bandsaw owner (and user) has a lot to do with your approach to coping with the fact that a bandsaw simply will not cut straight, or, in the sage words of veteran woodworkers, “adjusting for drift.”
The trick is in adjusting the fence, not the blade.

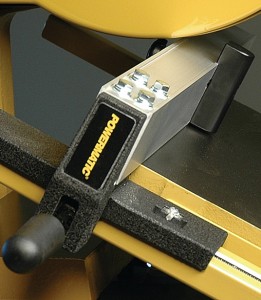
The Powermatic 14" bandsaw uas 4 bolts on top of the fence. Use these for adjustment to make the saw cut straight
While adjusting for drift is a process you’ll have to do every time you change the blade, it’s a very quick and painless exercise as long as your fence has some adjustment to it. And it may not be obvious. Even the top performing 14″ bandsaw on the market, Powermatic’s 14 Bandsaw 1791216K, comes with a no-frills fence with 4 bolts on top rather than easy and obvious thumbscrews or knobs that say, “Adjust me here!”
The tried-and-true method to adjusting for drift goes like this:
Our demonstrator, Joe, came up with this auxiliary bandsaw fence that uses his factory bandsaw fence that didn’t have any adjustment to it. Making the bandsaw cut nice and straight with this fence is a snap. The only tool required for adjusting is a screw driver.
Materials Required:
Making the Fence:
Vice President of Operations – Woodworkers Source
We’re a family-owned lumber & woodworking supply retailer with 3 delightful stores in Arizona, and 35 friendly employees.
Mark oversees the company and creates tutorials on wood finishing and woodworking tips for hardwood lumber.
Woodworkers Source is a division of MacBeath Hardwood Co.
