Okay folks, we’ve been around long enough to know that you’re going to be building your holiday gifts right up to the night when all through the house not a creature is stirring, not even a mouse.
And that probably means you’re gonna throw on a couple coats of finish a matter of hours before dawn. So, look, I know all about procrastination, I was an English major, I’m here to help!
Here’s a little guidance on how to pick a wood finish when you’re running short on time:
1. Spray & Wipe-on Finishes Are Fast & Good Looking
A wiping varnish applies fast, and makes dark woods look beautiful.
Rattle cans of lacquer or waterborne acrylic apply and dry so quickly that, if you’re in a pinch, this is my first recommendation when a yuletide deadline draws near.
You only need about 30 minutes between coats, and they can be scuffed baby-bottom smooth within moments.
On the downside, they’re not very tough finishes. Down the road repairs and refreshing may be needed but are easy to do.
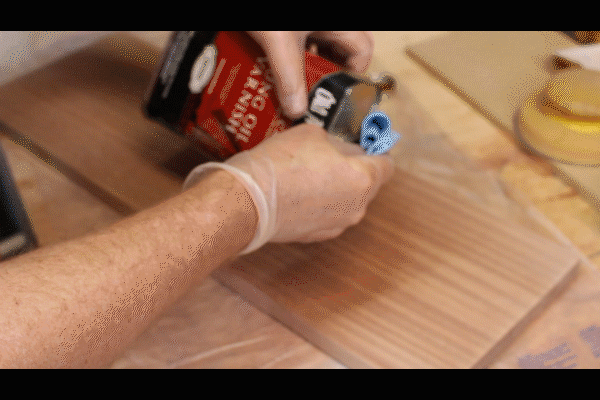
Second in line is a wipe-on varnish like Danish oil or another oil-varnish blend. That’s because the wipe-on, wipe-off application is nearly fool proof to get right and they look good with very, very little effort.
These types of finishes need about 6 hours to dry between coats, but for some decorative projects one coat will do the job just fine. BONUS: these finishes will make dark woods punchy with contrast and depth.
2. Avoid Brush-On Polyurethane
Brushing requires patient technique that you just don’t need with wiping finishes or spray finishes. Basically there are better choices when you need to finish fast.
The closer you are to the deadline, the riskier brushing is. Most types need at least 6 hours between coats. And, considering other options, it takes a fair amount of work to fix streaks and brush marks after it dries.
There’s not an advantage with brush on finishes when it comes to saving time.
3. Gel Polyurethane Has Some Upsides
If you want the toughness of polyurethane, get a gel poly. While its application is a simple wipe-on and wipe-off, it takes a little more attention than other wiping finishes to avoid streaks and drags. The good news is gel poly needs only about 4 hours to dry between coats. But keep your greasy paws off of it until it does, or you’ll fossilize a fingerprint.
Once this finish dries, do a light scuffing* with a synthetic finishing pad or fine grit sand paper — and if you’ve got a little more time, do a second coat and scuffing.
4. Shellac Dries Even Faster
It’s not only fast, but it’s also one of the safest ones to work with.
Shellac is so simple, you can apply it with a cotton pad, a brush, or with a sprayer. Give it a couple coats within an hour or two, and a couple hours later you’ll be able to scuff and polish with a paste wax to give it a gorgeous, classic look.
Arguably shellac is not the best choice for a something that needs serious protection like a table top. But it is a good choice when you’re under the gun!
5. Forget High Gloss
The secret ingredient to achieving a mirror-like glossy finish isn’t in the product, but in your patience. Expect to spend at least a week building up coats and sanding between each one in order to build a good glossy finish.
That’s because a good gloss needs a lot coats, a lot of elbow grease, and a lot of time to work it in to submission.
If you don’t have the time for that, consider a different finish. It just takes too long to do it really well.
6. Matte, Satin or Semi-Gloss Sheen?
Yes, any will do, and will be much easier to do with less time.
7. If it was my project . . .
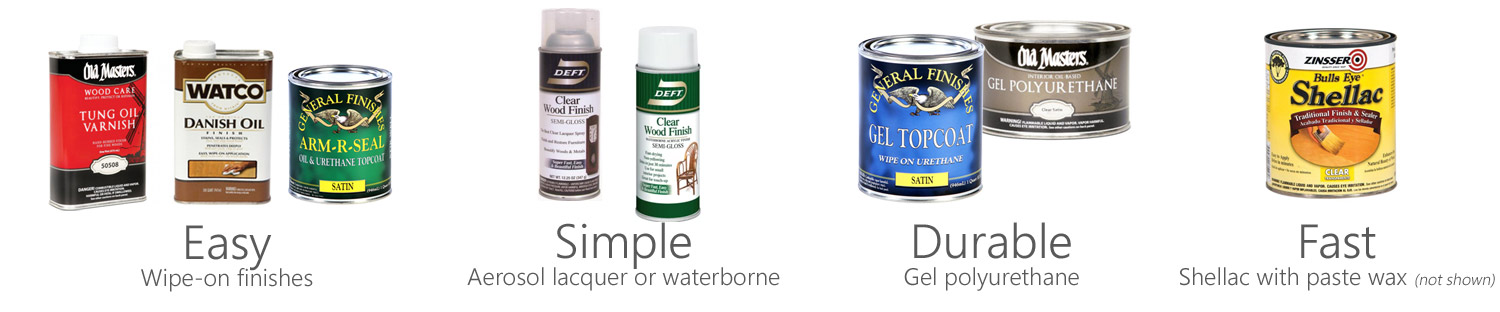
If I’m in a hurry, I’d go forone coat, maybe three if possible, of any wiping oil-varnish finishes (Arm-r-Seal by General Finishes, Tung Oil Varnish by Old Masters, Watco Danish Oil, etc).
I would get a coat on at least 3 days before the big day, too. One coat gives you an elegant flat sheen “in-the-wood” look, but also makes most medium and dark woods look gorgeous. Just needs a light scuffing with a synthetic finishing pad after it’s dry – and if you prep sanded the project really well, it’ll come out great.
It’s a low-risk finish, meaning it’ll make the wood look beautiful. And you don’t have to worry about brush marks, or working out drips, runs or other flaws that aerosol lacquer or padded shellac might bring.
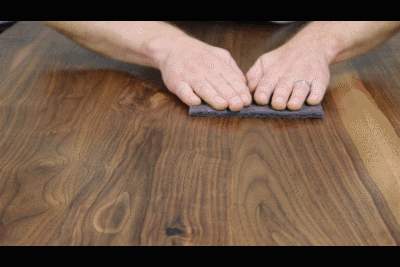
Between coats of finish, use steel wool, fine grit sand paper, or a synthetic finishing pad to knock down flaws in your wood finish – and to make it baby-bottom smooth
*What is scuffing?
That’s the act of lightly sanding a finish after it’s dry. It’s best to do this between each coat of finish, regardless of the type – even if the can assures you with, “No sanding between coats!”
Sure, you can live without scuffing between coats, but you get a better looking (and feeling) finish if you do.
The point is to knock down dust nibs, streaks, or runs that happened during the application.
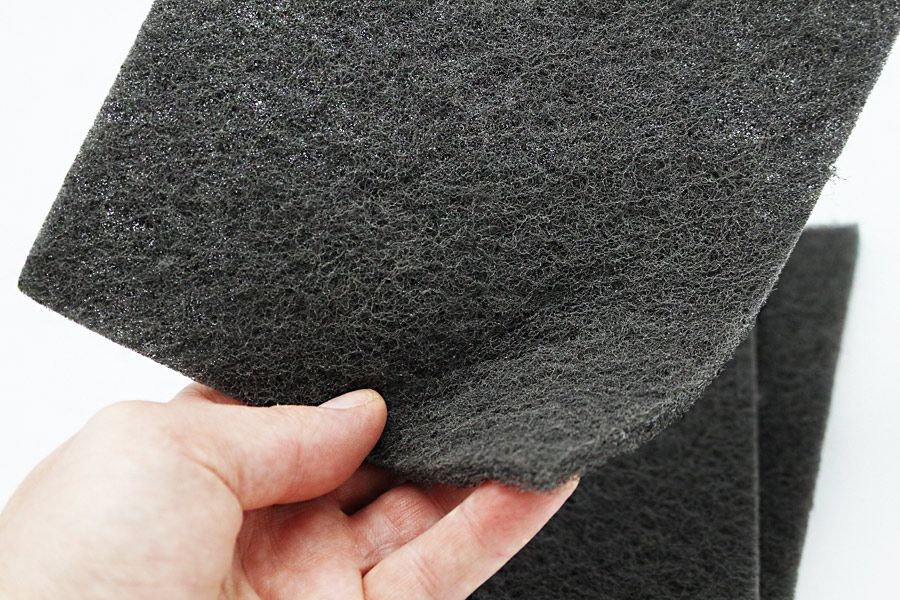
To scuff, you can use:
steel wool, or
fine grit wet/dry sand paper (400 grit or higher), or
Vice President of Operations – Woodworkers Source
We’re a family-owned lumber & woodworking supply retailer with 3 delightful stores in Arizona, and 35 friendly employees.
Mark oversees the company and creates tutorials on wood finishing and woodworking tips for hardwood lumber.
Woodworkers Source is a division of MacBeath Hardwood Co.
You are always welcome to stop in anytime to hand-select your own boards.
Or you can order ahead for a scheduled pickup! Typically ready in 24 hours at your chosen store. Just call or order online. Available times are shown during checkout -- pick whatever works for you.