Since European beech is very close-grained and dense, you can get a wonderfully smooth and flawless finish on the wood with very little trouble. Prepping the wood goes quickly, too, as abrasive sandpaper cuts this wood fast – unlike hard maple, which shares a similar density and light color.
However, European beech is a tricky one to stain or dye to achieve a nice, even color. That is, unless you know some tehniques – a few of them are demonstrated in this video above. Otherwise, here are some visuals and recipes for finishing beech, and each of these are shown in the video. As usual, what you find here are just a few items off the big, broad menu of wood finishing. But this should help you get started.
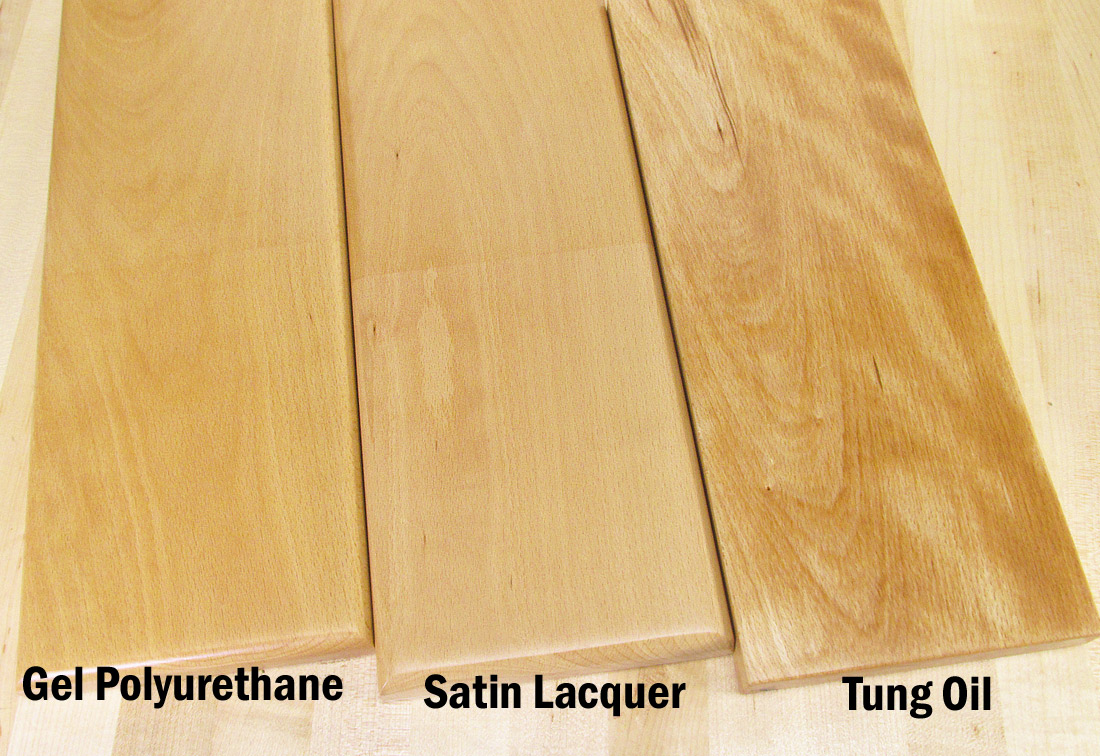
Gel Polyurethane. This is one of the easiest protective finishes to apply, and it’s one of the most durable finishes readily available to consumers. It’s a fine choice for protecting a project built with beech; you’ll probably like how painlessly you can get a good, flat topcoat. Because it’s a thick, creamy gel that you wipe on and wipe off, you can use a foam brush or a lint-free rag to apply a coat. Then as you wipe it off with a clean cloth, you’re leveling as you go, which helps you get a great looking coat with little effort. Allow the coat to dry (usually about 6 hours), then apply another in the same fashion. Sanding is not required between coats, unless you feel like your first coat could use it. Such as if you can feel small nibs in your first coat.
Spray lacquer is another choice that has advantages over polyurethane — and some disadvantages. Because it dries faster than polyurethane, you can apply several good coats in one day and move on to rubbing it out and polishing sooner than you can with a polyurethane. Lacquer is, arguably, easier to fix months or years down the road as the finish gets dinged and scratched. Some lacquers are also available as a “water white” formula that doesn’t yellow with age as polyurethane does. If you want to keep that pale, tan color of beech, this might be the finish choice for you. However, spray lacquer is kind of picky about the weather – if humidity is 50% or higher the finish can come out milky, if the temperature is below 50ºF the finish takes longer to dry and won’t flatten as well.
Tung oil and other oils are popular for embellishing all kinds of wood. Tung oil in particular provides some extra contrast to beech. Oil, though, is not a durable topcoat. If you like the look of tung oil but need good surface protection, you can have both. Simply allow the oil to cure, then apply a your topcoat of choice – such as the gel polyurethane or spray lacquer, above.
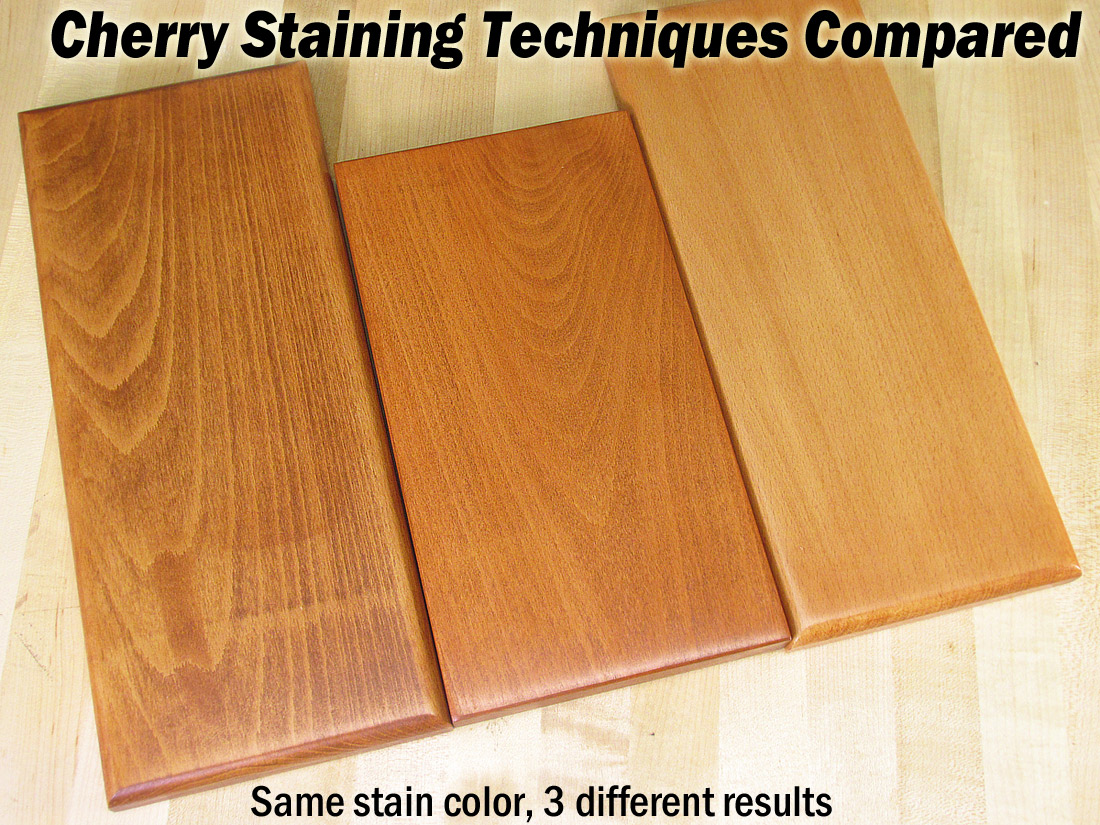
The same cherry colored oil stain is applied to each board – yet there are three drastic results. At left, you can see how blotchy the wood is. A basic penetrating oil stain was applied to the bare wood, sanded to 220 grit. To fix it, try a gel stain (middle). Gel stains give you more predictable coverage. If the color of the gel is too strong, try applying a washcoat of dewaxed shellac or a sealer first (right)
Regular oil stains are problematic when applied right to the bare wood, even if sanded properly. Beech simply will not accept stain very evenly, also known as blotching. Fortunately, there are a few ways to color beech without living with a blotchy and unsightly color. Some choices are:
1. Use a gel stain on the bare wood, especially if you want a significant color change. Gel stains are different from other oil or water based stains: they’re thick, creamy and formulated to be used on fiberglass. Yet they happen to do brilliant work on woods that usually blotch with other stains. Application is simple. Use a brush or rag to coat the surface of the wood, then wipe it off. You’ll need to pay attention as you wipe it off, though, being sure not to rub off too much in one or more areas. But don’t worry, it’s not hard – if you happen to wipe off too much stain in one area, simply add a touch of stain to that section and blend it in while the stain is wet.
2. Use a washcoat, then a gel stain to do a more mild color change. A washcoat is just a thin coat of sealer applied to the wood before the stain. When applied to bare wood, gel stain will lay a coat of pigment over the surface of the wood. But on a washcoat you can use the same gel stain and get a mellow color change that doesn’t obscure the wood grain as much.
What about aniline dye? In most woods, dyes usually are a good alternative when an oil stain causes the wood to blotch. But in beech, even dyes have trouble coloring the wood evenly. However, they are good for creating some graceful and nuanced colors, and for ebonizing or making the wood black.
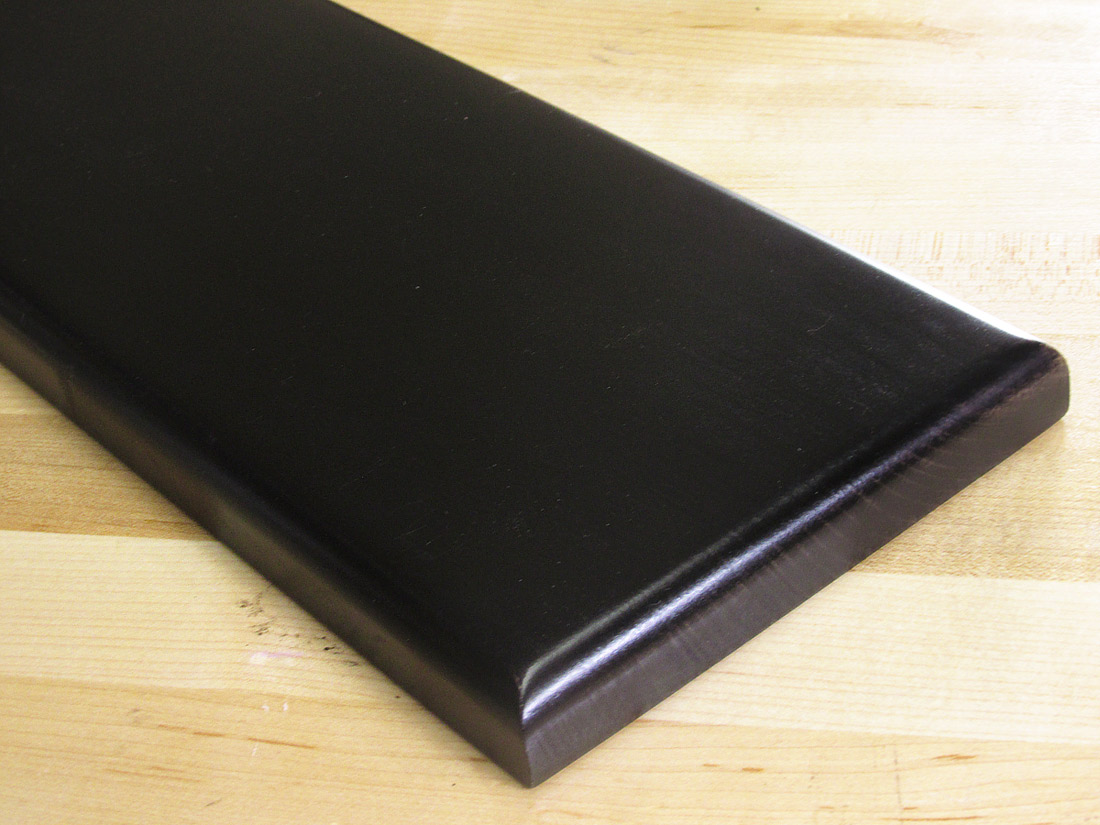
Beech takes a solid jet black dye, making it an inexpensive way to achieve a perfectly black color.
To ebonize beech, or make it black, here’s one way to do it:
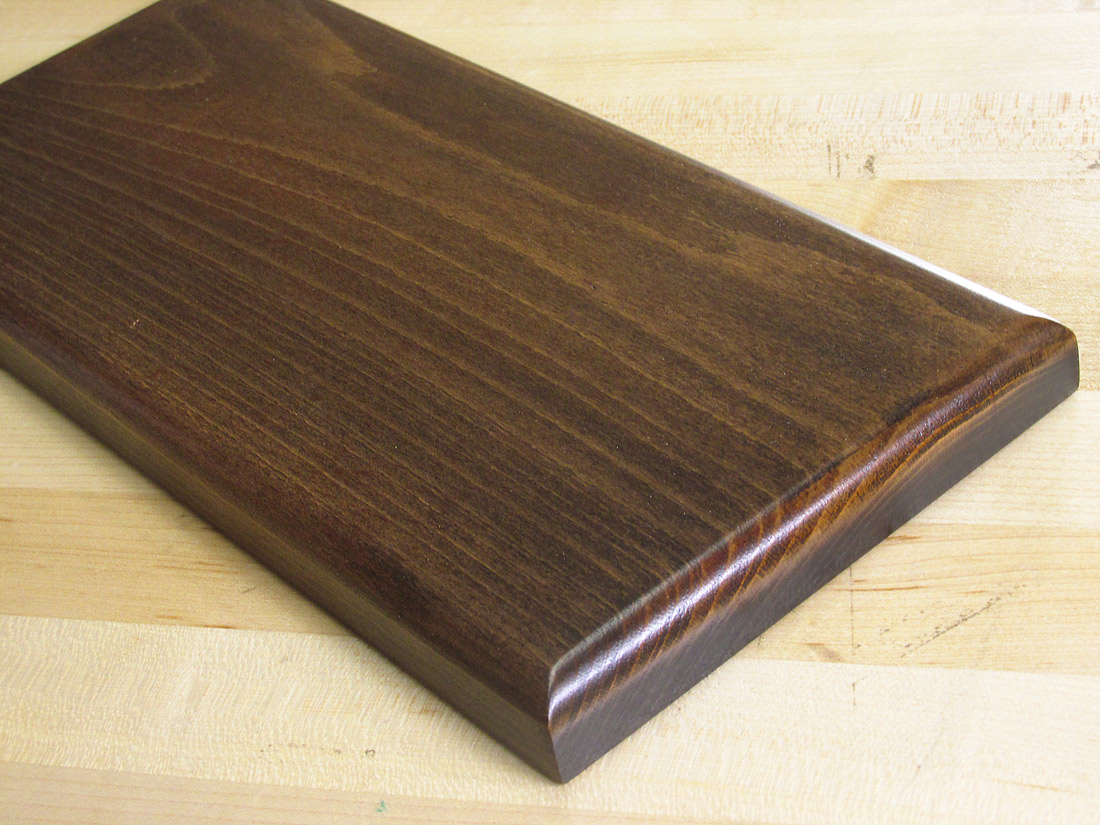
Doing a three-step coloring process, you can achieve some nice colors. This sample has a reddish orange aniline dye, then a sealer, then it’s been glazed with a dark brown gel stain. The result is largely a dark brown, but hints of red and orange come through as well.
Dyes can also be used with a glazing technique to make more interesting colors. The board at right isn’t just a dark brown – there are hints of reddish orange in the lighter area.
Vice President of Operations – Woodworkers Source
We’re a family-owned lumber & woodworking supply retailer with 3 delightful stores in Arizona, and 35 friendly employees.
Mark oversees the company and creates tutorials on wood finishing and woodworking tips for hardwood lumber.
Woodworkers Source is a division of MacBeath Hardwood Co.
