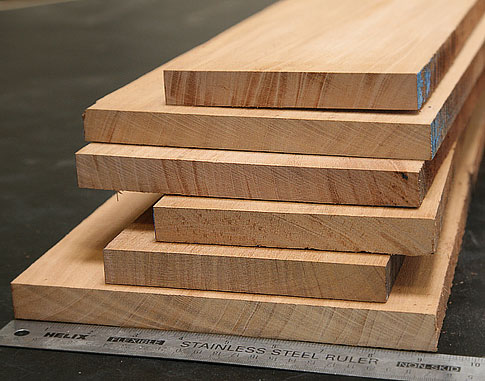
1/4" (5.2mm) Cherry Pre-Cut Plywood Pack (Choose Your Size)
No Reviews Yet |
Write a Review

$114.99 /Pack
Free Shipping
48 U.S. Ground Service
How Do You Want It?
Pickup In-Store
Click to choose a location
Ship to My Door
Arrives Fri, Nov 27 - Tue, Dec 1
Description
Specifications
Nominal Thickness
1/4"
Actual Thickness
5.2mm
Width
15", 20" or 24"
± 1/8" tolerance
Length
30", 46", or 90"
± 1/2" tolerance
Quantity
Your choice
Core Type
MDF Core
Weight per SF
3
Formaldehyde
CARB2 Certified / EPA TSCA Title VI Compliant
Brand
Woodworkers Source
What to Know About This Wood
Cherry is one of those woods that gets better with time. Freshly cut, planed, routed, or sanded cherry can look surprisingly pale—even if the board looked beautifully oxidized when you bought it. That's normal. Exposure to air and mild UV light gradually develops the warm rusty, russet-brown color cherry is known for.
The simplest and most reliable approach is to let the color develop naturally. A few days of mild UV exposure can get things moving, while the color will continue to mature over the next 6–8 months. Avoid prolonged direct sunlight, which can eventually bleach the wood rather than improve the color. Home-brew aging methods using baking soda, lye, or similar treatments exist, but they require testing and can produce unpredictable results.
In the shop, cherry is a pleasure to work. It's medium-dense, tight-grained, and sits in a sweet spot between too soft and too hard. It cuts, routes, planes, and sands easily with sharp carbide tooling and generally doesn't splinter much. The big exception is burning: cherry can develop dark blade marks quickly if your feed rate slows down or stops during a cut. Keep the workpiece moving consistently through the saw or router.
Use & Care
Plywood is stable, versatile, and easy to work with, but proper storage, handling, and cutting techniques help protect the faces, reduce tearout, and improve your finished results.
Store It Flat and Dry
Store plywood flat on a level, fully supported surface. Keep it dry and protected from direct sunlight or damp conditions to help prevent bowing, warping, or edge damage.
Let Panels Acclimate
Give plywood time to adjust to your shop or project environment before cutting or installation, especially when moving panels between significantly different temperature or humidity conditions.
Protect the Face Veneer
Decorative face veneers can be scratched, dented, or chipped. Handle panels carefully, avoid dragging them across rough surfaces, and keep clean material between sheets when stacking.
Use Sharp Blades and Good Support
Sharp blades and full support help produce cleaner cuts and reduce tearout. Choose a blade suited for plywood or fine crosscut work, and support the panel securely during cutting.
Plan for Clean Edges
Visible edges and crosscuts may need extra care. Proper blade selection, scoring, tape, or backing material can help reduce splintering and chip-out where appearance matters.
Test Your Finish First
Test stains, dyes, oils, or clear finishes on an offcut or inconspicuous area before finishing the project. Decorative veneers can respond differently than solid lumber to color and finish products.
Tip:
Inspect the panel before cutting so you can plan around grain direction, face appearance,
and the best placement of visible project parts.
Customer Reviews
No Reviews Yet! Write a Review
Project Inspiration
Lumber Deals & Woodworking Tips
SIGN UP NOW to get a $10 coupon!
Our weekly email newsletter is pretty cool with project pictures made by our customers, woodworking tips, and lumber deals just for our newsletter subscribers.
We'll even give you $10 to use on any purchase of $50 or more at Woodworkers Source.