Bathroom Vanity
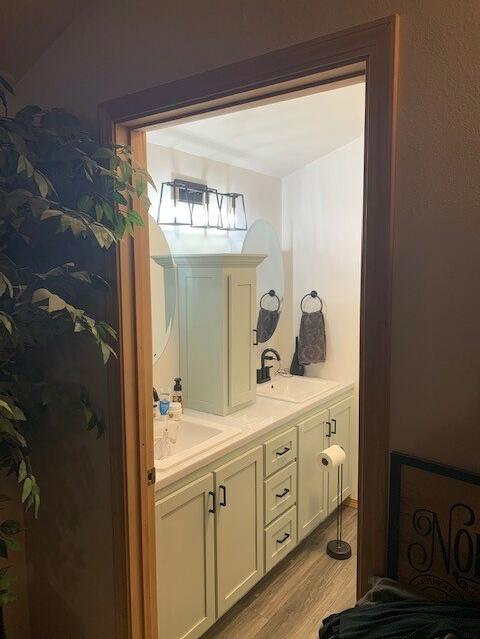
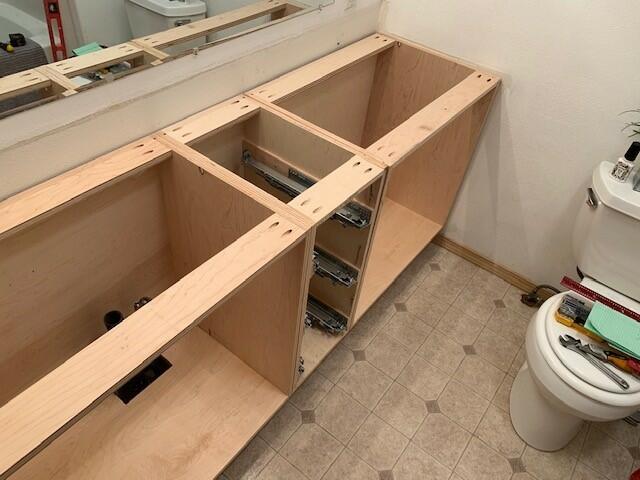
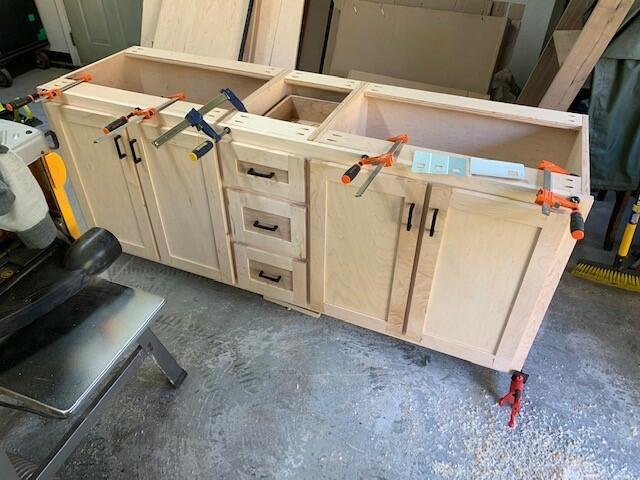
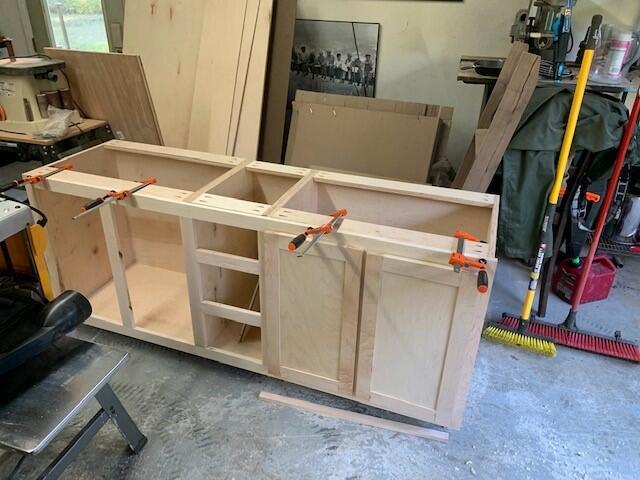
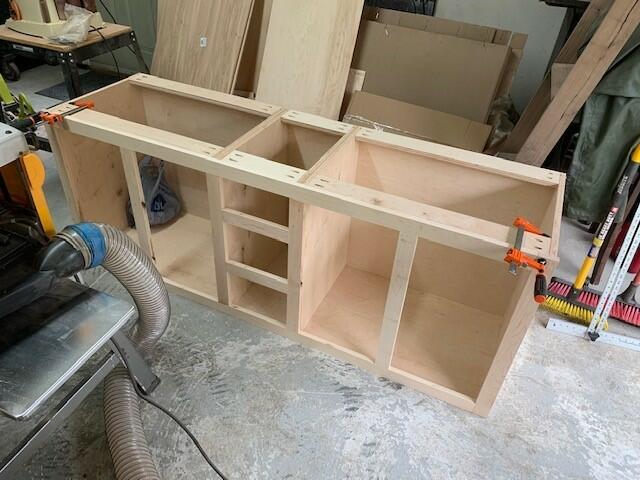
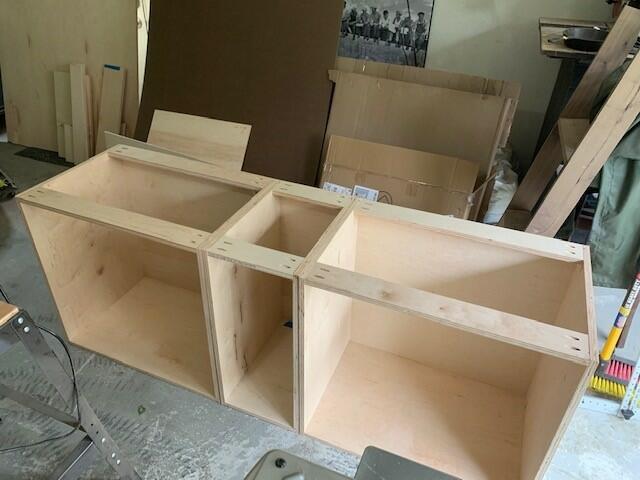
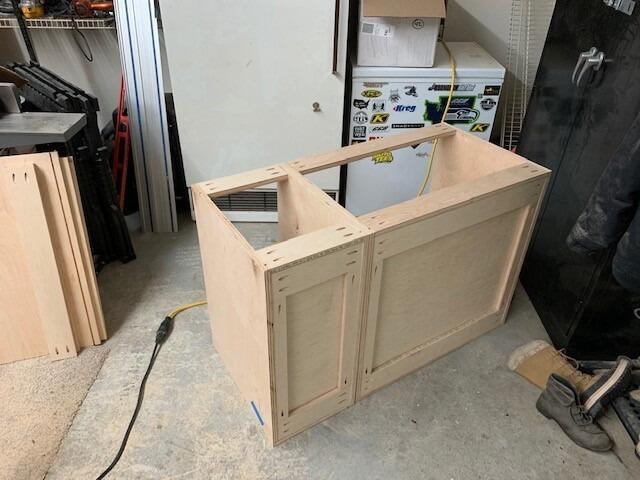
We decided to remodel our bathroom and the cabinets that were in there were that typical builder grade oak. The original cabinet carcasses were cheap big box store quality and I am surprised they lasted as long as they did. I built 4 cabinet carcasses. One for each sink and the center which is just for drawers. I figured it was easier to install three smaller carcasses than one bog one. The carcasses are made from 3/4" maple plywood. I believe the grade was B2. I had to take out a second mortgage. The sides of the carcasses have a 3/4" dado on the bottom edge that allows for a lap joint on the bottom piece concealing the raw plywood edge. This is unnecessary because this vanity goes wall to wall. The side pieces, bottom and top rear stretcher all have a 1/4" dado 3/4" from the rear edge allowing for a 1/4" piece of maple plywood to slide in. This also allows for a 3/4" backer to fit flush with the rest of the cabinet carcass. The backs all have backers to attach to a stud in the wall. The face frame is hard maple and is a shaker style and has mortise & tenon joinery. The doors have mortise and tenon joinery as well. The cabinet doors have a floating 1/4" maple panel and the drawers have a 1/2" maple plywood panel that has a 1/4" dado that allows the back side of the panel to be even with the back side of the drawer face frame. This allows for a strong connection to the drawer boxes. The drawers are 1/2" maple plywood and use box joints and a 1/4" maple plywood bottom. I used Blum undermount drawer slides. The top vanity was has crown molding decorative top. I had never cut crown before. I have a lot of respect for guys who do it for a living. The finish was my wife's decision. I wanted a had rubbed finish but we decided that since it is in a bathroom cabinet paint would probably be a more durable finish. I did the bulk of the work in 5 days.
Finish: Valspar Cabinet Paint
No project plans available.
Project posted: