Blog Home > Tips and Tricks, Wood Finishing
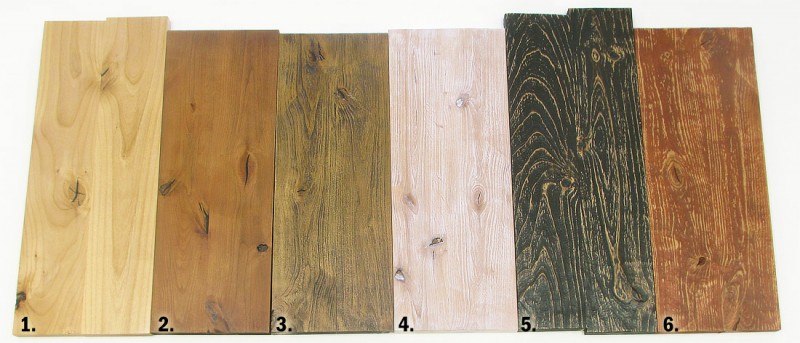
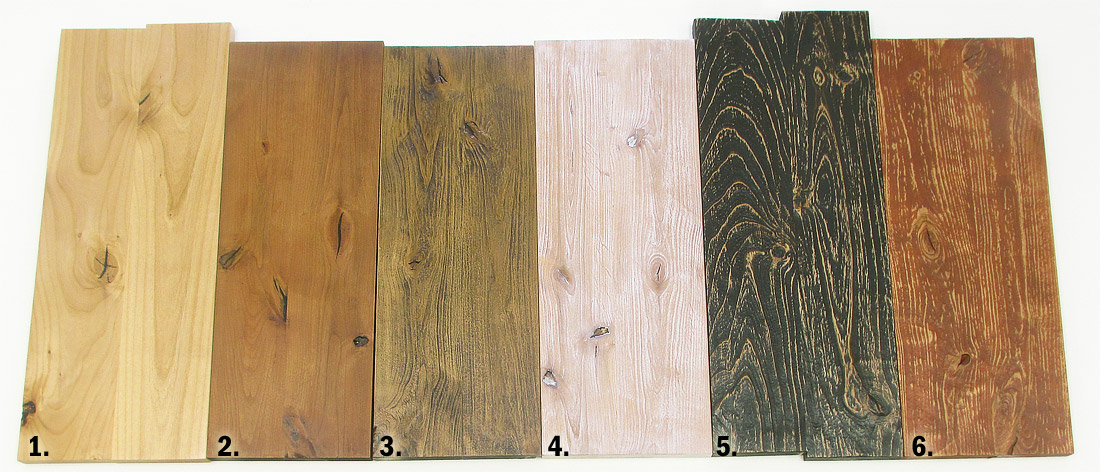
You can achieve numerous colors and rustic, charred, weathered, or distressed looks on your alder woodworking projects. Here are 6 easy and dramatic methods.
If there’s one thing to understand about creating a rustic or distressed finish in alder woodworking projects, it’s this: there is no wrong answer. But still, maybe you want a handful of ideas to get your creative gears greased up. Indeed, of all wood finishes, rustic/aged techniques are probably the most fun to do – perhaps because they’re more art than skill. You’ll have a good time with these techniques, and you’ll have even more fun as you modify them to suit your taste. If you have questions or comments, just share down at the bottom.
Working from left to right in the picture above, I’ll walk you through how to do each one. Click on any picture to zoom in for a closer look.
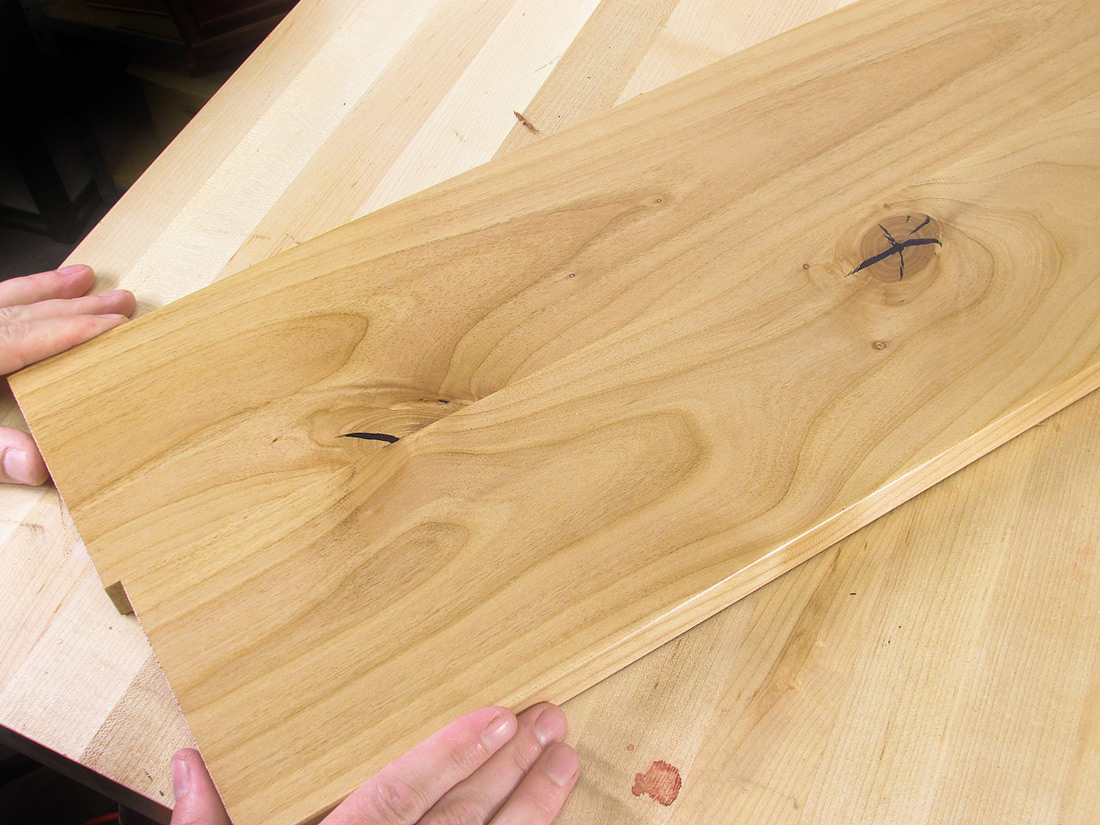
1. Clear Lacquer, Epoxy-Filled Knots & Cracks

The most straightforward way to finish knotty alder is to emphasize the knots. Using two-part epoxy and black pigment, you can fill in the cracks of the knots with high-contrast black.
See the how-to process for filling cracks with black epoxy here.
To protect alder with a clear finish, try this out:
- Sand your work to 180 or 220 grit.
- Apply dewaxed shellac for a sealer. Sand it smooth with a fine grit sand paper or finishing pad. Apply 2 or 3 coats to your satisfaction. The purpose of the shellac is to give you a good, smooth surface to apply the lacquer, ultimately making it much easier to get a glass-smooth sheen.
- Spray lacquer, sanding between coats. Apply 2 or 3 coats.
- After the final coat has dried, give it a light sanding with a finish pad or abrasive sponge. Polish the lacquer with a buffers polish or wax.
|
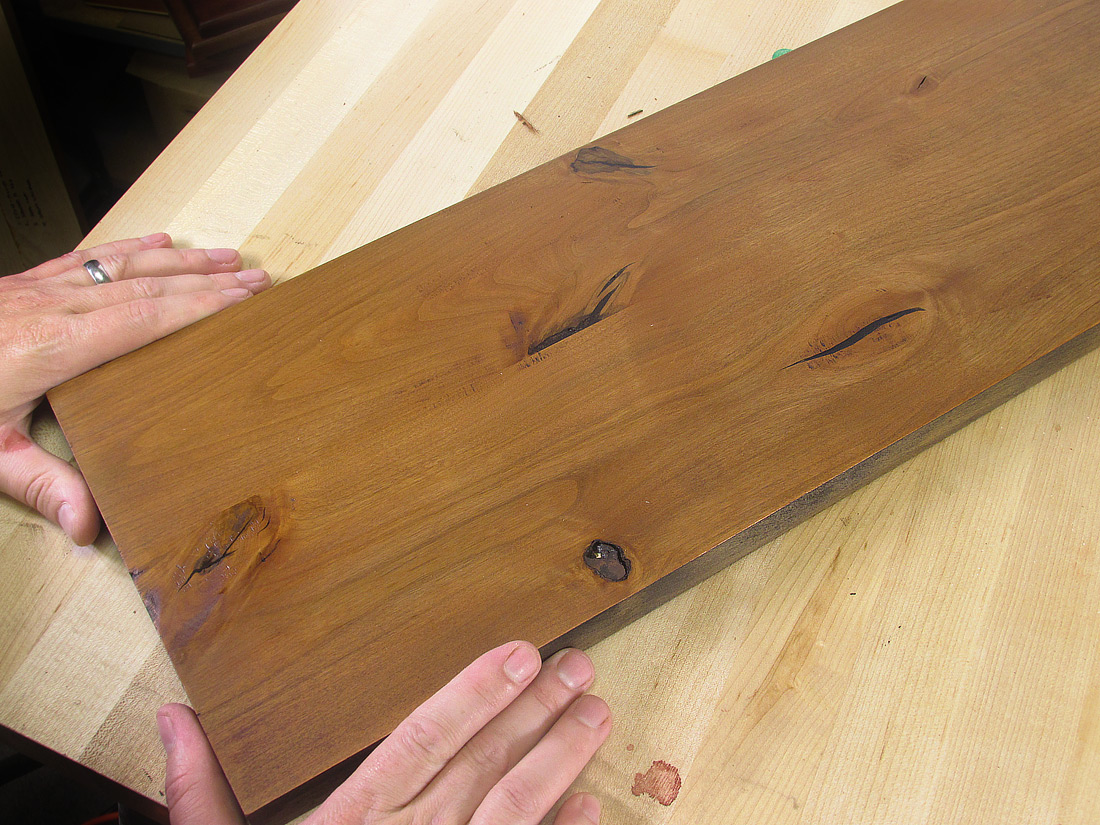
2. Dark Even Color, Epoxy-Filled Knots & Cracks
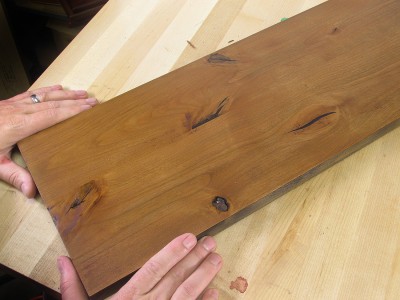
Alder is a wood that doesn’t accept stains very well, resulting in blotchy color. Even though we’re going for a rustic or distressed appearance, a blotchy stain can still look downright ugly. Perhaps try this finishing method to get nice, even color. For greater effect, fill the cracks with black epoxy before applying this finish.
- Apply a light colored dye. In this sample, that’s Golden Fruitwood, and it makes a light reddish to pink color.
- Apply a sealer. Zinsser SealCoat is a fine choice because it’s universal. One coat is all you need, let it dry, then if it feels like it needs it, do a quick and light scuff sand to remove dust nibs in the sealer.
- Apply a gel stain to glaze the color. For this sample we used Old Masters Dark Walnut Gel Stain, which is a very dark brown. Wipe it on to the surface, then wipe it off. Be careful to be gentle enough that the gel leaves a good, even coat of color on the board.
|
***
The next four samples employ a weathering technique that creates a textured wood surface. Using an angle grinder or a drill with a wire wheel, the process is quick and effective. The looks you can get by adding a little bit of gel stain to the textured wood are fantastically diverse. Tips for how to texture alder with an angle grinder are at the bottom.
***
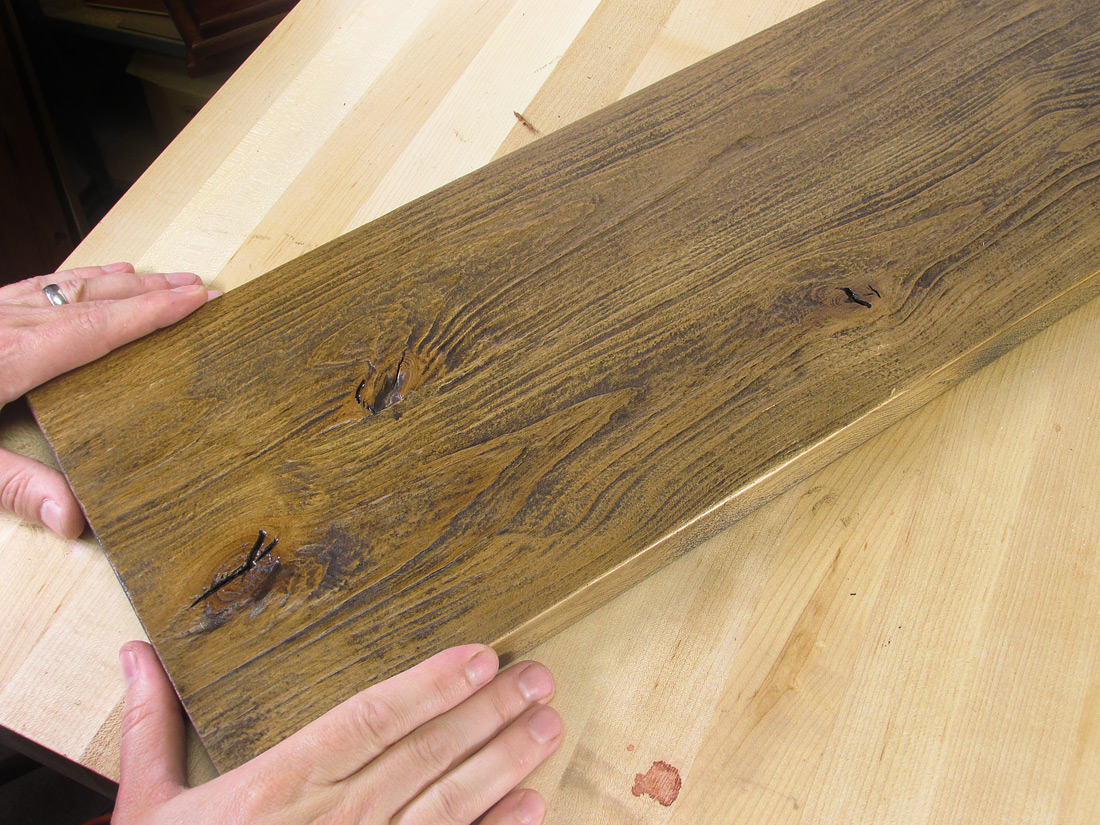
3. Dark Weathered Alder

To get a nice dark and weathered appearance in alder, try this:
- Using a wire wheel in an angle grinder, texture the alder (details at bottom).
- Lightly sand with a fine grit (150 or 220 grit perhaps) sanding sponge. Don’t try to level the ridges and produced during the texture process, just knock down fuzzy grain.
- Apply a sealer. Spraying is easiest due to the texturing – brushing or wiping is more laborious. Lacquer sanding sealer comes in aerosol cans if you do not have HVLP spray equipment.
- After the sealer dries, use a dark brown gel stain — Old Masters Dark Walnut Gel Stain is shown here. Wipe it on and wipe it off. The gel will collect in the valleys you created during the texturing process.
- Allow the stain to dry, then apply 2 or 3 coats of spray lacquer to seal and protect.
|
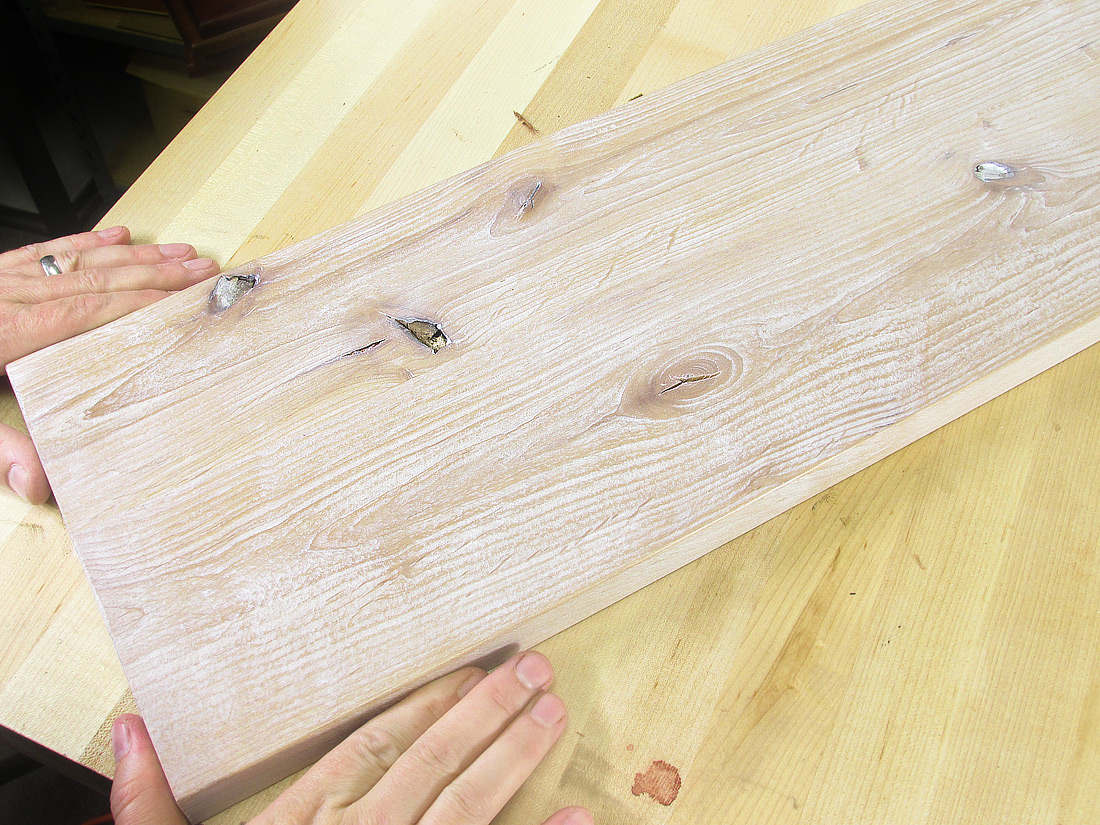
4. Country Pickled Alder

Perhaps you want a pleasant light country look? Same process, just a different gel stain color.
- Using a wire wheel in an angle grinder, texture the alder (details at bottom).
- Lightly sand with a fine grit (150 or 220 grit perhaps) sanding sponge. Don’t try to level the ridges and produced during the texture process, just knock down fuzzy grain.
- Apply a sealer. Spraying is easiest due to the texturing – brushing or wiping is more laborious. Lacquer sanding sealer comes in aerosol cans if you do not have HVLP spray equipment.
- After the sealer dries, use a white gel stain — Old Masters Pickling White Gel Stain is shown here. Wipe it on and wipe it off. The gel will collect in the valleys you created during the texturing process.
- Allow the stain to dry, then apply 2 or 3 coats of spray lacquer to seal and protect.
|
5. Charred Wood Finish
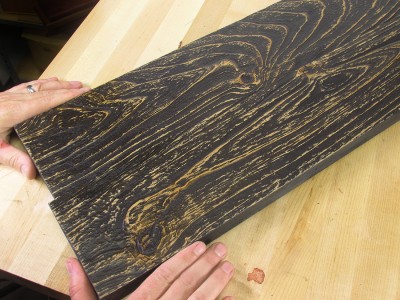
Here’s a unique look that resembles charred or burnt wood, and it’s easy to pull off.
- Using a wire wheel in an angle grinder, texture the alder (details at bottom).
- Lightly sand with a fine grit (150 or 220 grit perhaps) sanding sponge. Don’t try to level the ridges and produced during the texture process, just knock down fuzzy grain.
- Apply a black gel stain. Old Masters Spanish Oak is used in this sample. Wipe it on, then wipe it off. Allow the stain to dry. There’s a chance that the wipe-off procedure will reveal enough of the wood that you’re pleased with the look. If so, skip to step 5.
- Use a sanding block with 220-grit sandpaper and lightly sand the workpiece.
- Seal and protect your project with any topcoat finish you want. Most likely polyurethane or lacquer. Due to the texture of the wood, spraying is easiest. Brushing or wiping is more difficult.
|
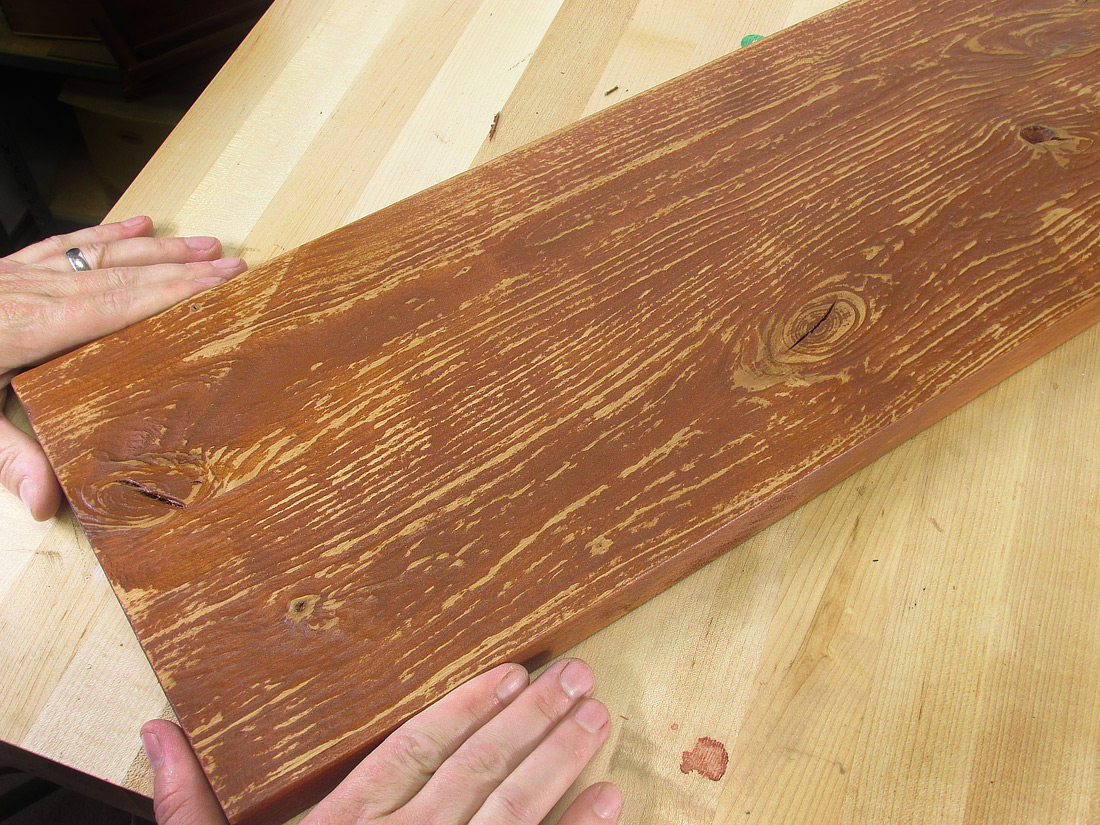
6. Reclaimed Red Barn Wood

Similarly, you can use a reddish stain that just might spark memories of summers at the farm and the scent of Grampa’s tractor shed:
- Using a wire wheel in an angle grinder, texture the alder (details at bottom).
- Lightly sand with a fine grit (150 or 220 grit perhaps) sanding sponge. Don’t try to level the ridges and produced during the texture process, just knock down fuzzy grain.
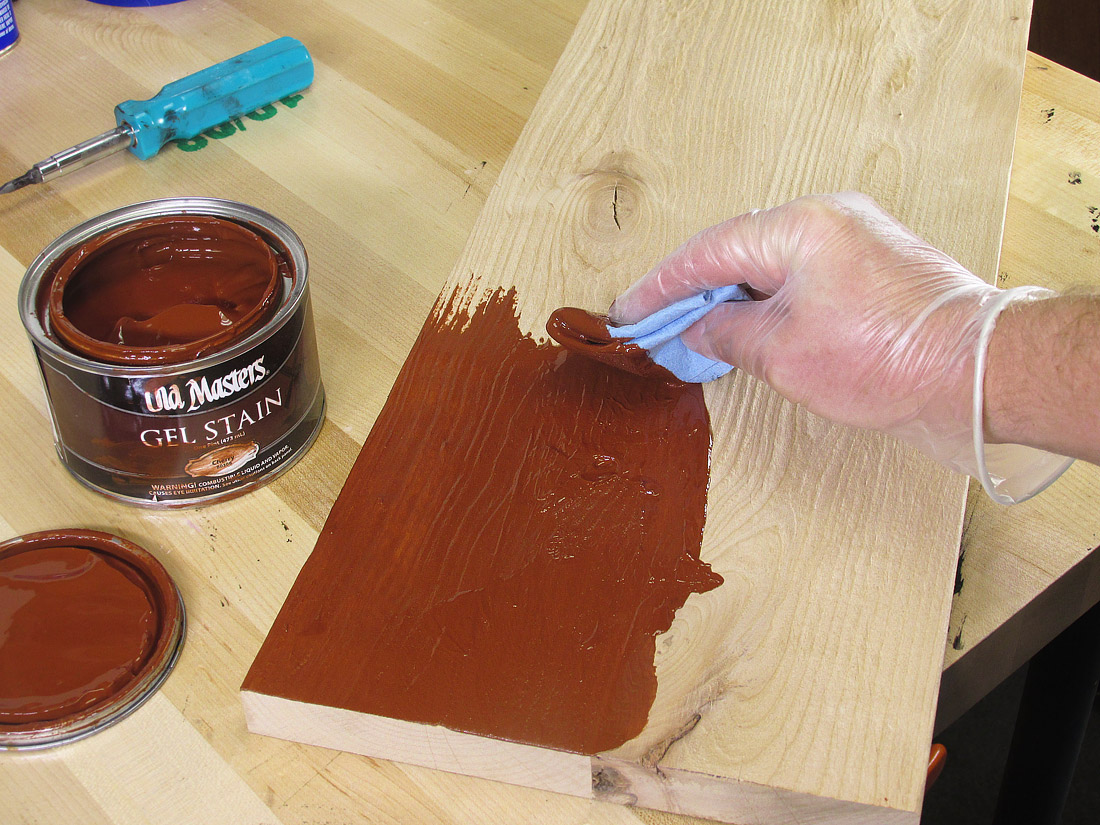
- Apply a reddish brown gel stain. Old Masters Cherry is used in this sample. Wipe it on, then wipe it off. Allow the stain to dry.
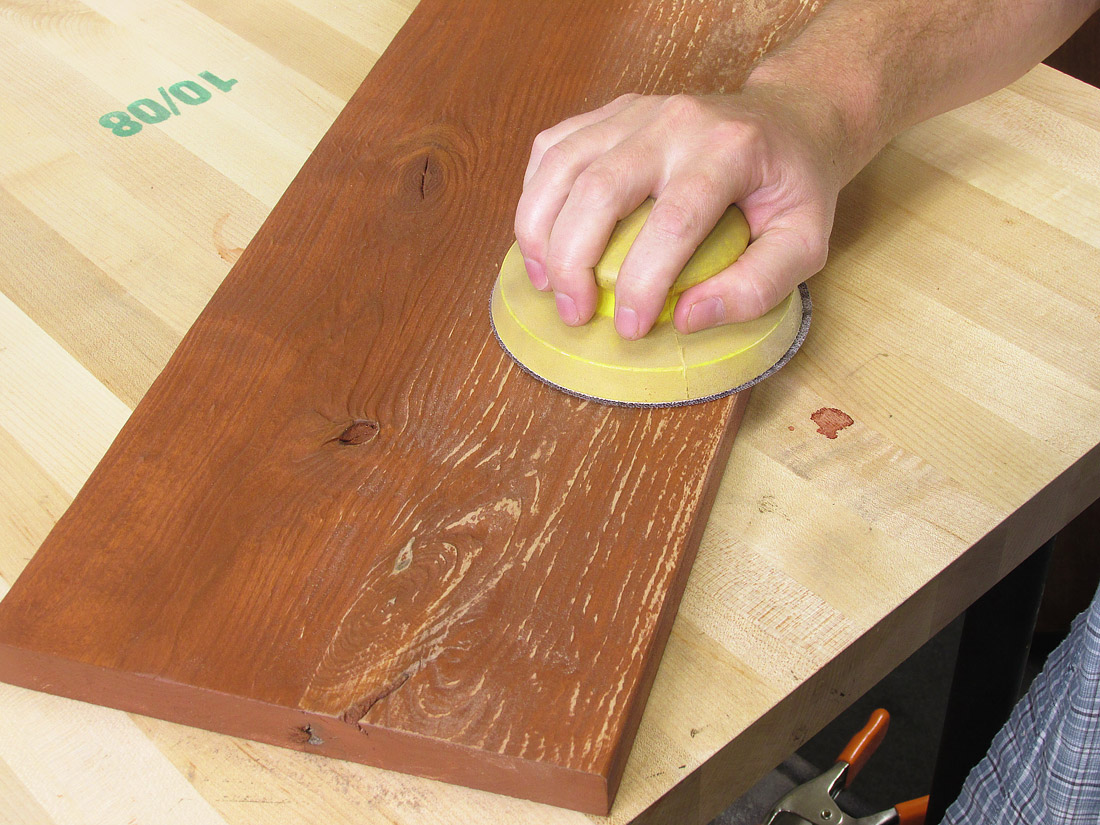
- Use a sanding block with 220-grit sandpaper and lightly sand the workpiece.
- Seal and protect your project with any topcoat finish you want. Most likely polyurethane or lacquer. Due to the texture of the wood, spraying is easiest. Brushing or wiping is more difficult.
|
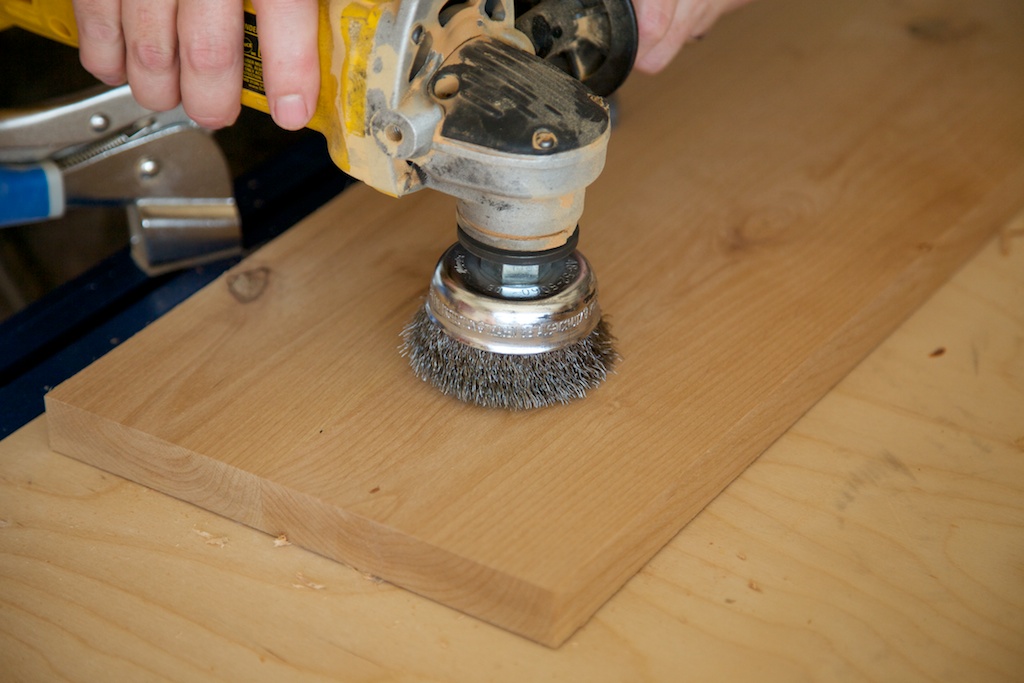
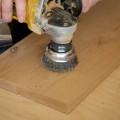
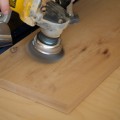
How To Create a Weathered Texture on Wood
Click the images to enlarge, use your arrow keys to scroll through each one.
-
-
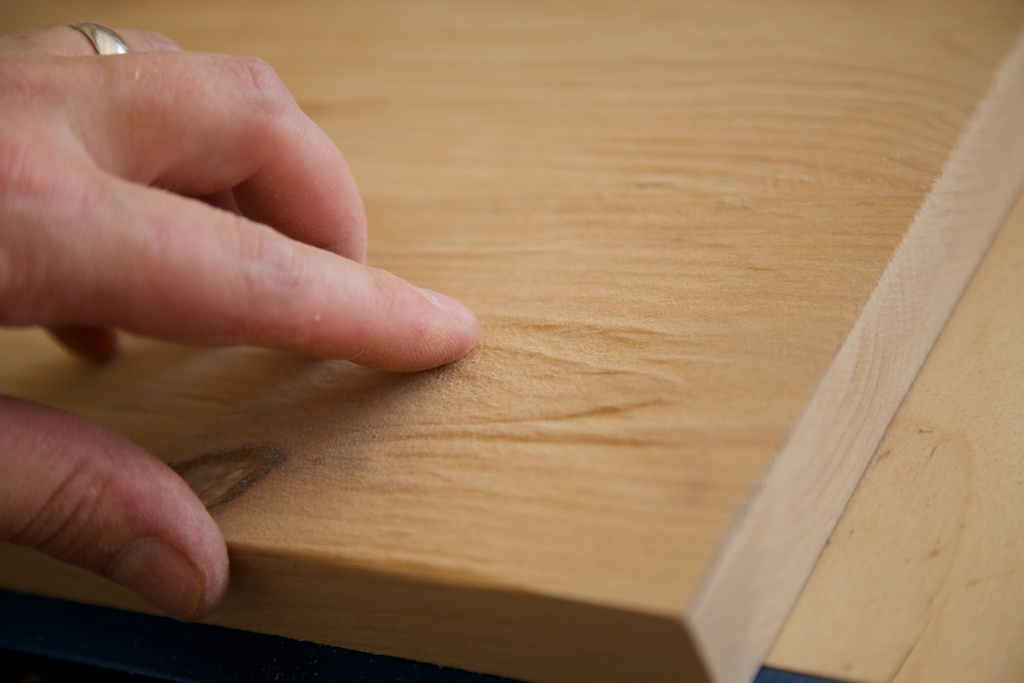
A simple wire cup wheel on your angle grinder is what performs the magic of weathering the wood. A wire wheel on a drill also works, but is slower.
-
-
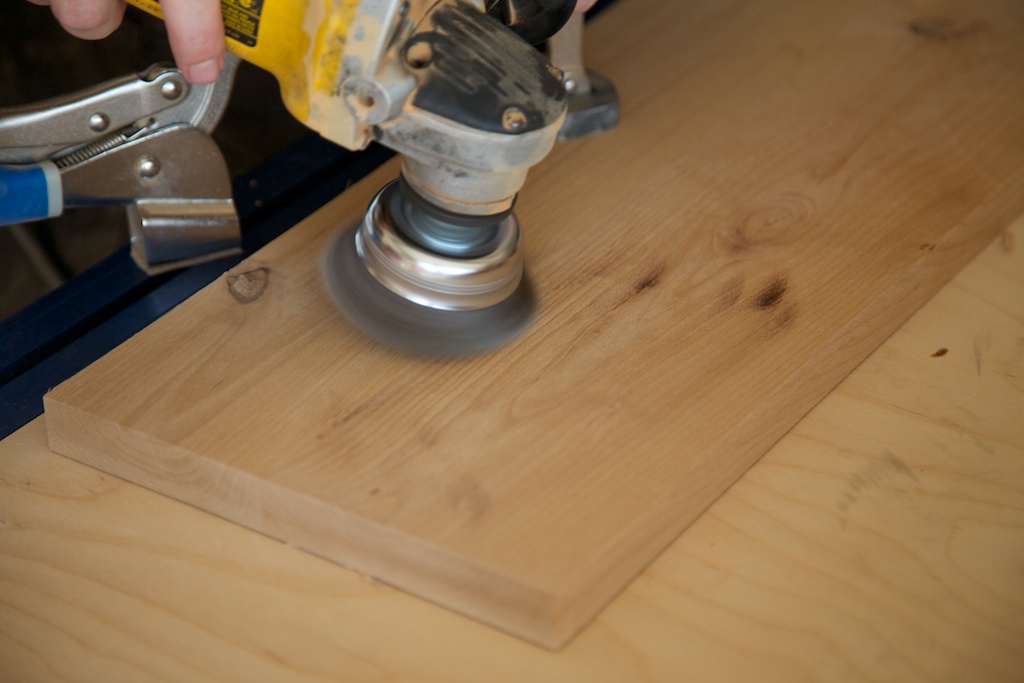
Work the wire wheel back and forth, going with the grain. Be sure to wear a dust mask and goggles because this generates a lot of dust.
-
-
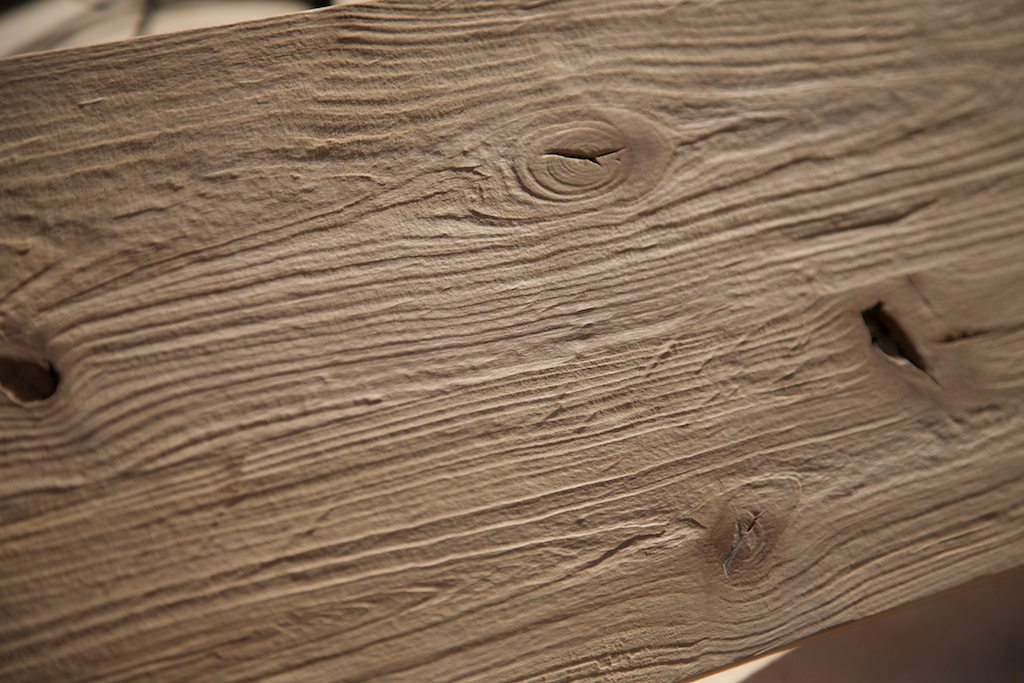
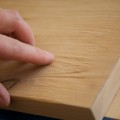
After a couple of quick passes, you’ll quickly notice the texture coming out.
-
-
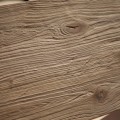
A little side light cast across the grain reveals the valleys and ridges of the textured alder
-
-
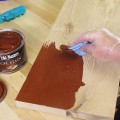
After texturing, use a fine grit sanding sponge of 180 or 220 grit to remove “fuzz”. Then apply a gel stain of any color you want.
-
-
After the stain is dry, using a sanding block with some 220-grit sandpaper. A couple of passes is all it takes to remove the stain from the ridges. Clean off the dust, then seal and protect this with your topcoat finish of choice.
Vice President of Operations – Woodworkers Source
We’re a family-owned lumber & woodworking supply retailer with 3 delightful stores in Arizona, and 35 friendly employees.
Mark oversees the company and creates tutorials on wood finishing and woodworking tips for hardwood lumber.
Woodworkers Source is a division of MacBeath Hardwood Co.
Discussion, Questions & Answers